ID creation/ Scheduling procedure
We will guide you through the steps to create an ID, reserve, change, and cancel your exam.
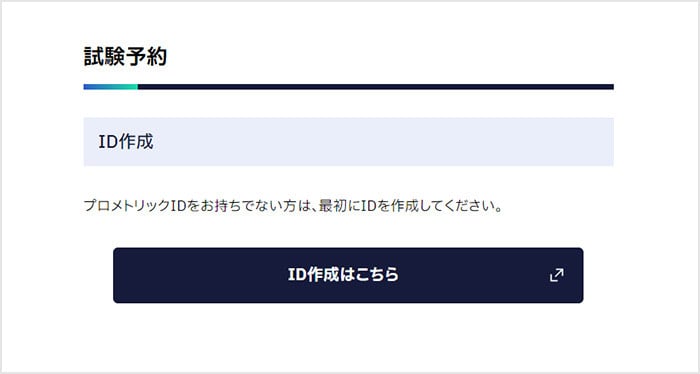
Prometric ID is required to schedule an exam. If you do not have a Prometric ID, please create one first.
ID creation
The ID you create can be used for all exams conducted by Prometric (with the exception of some exams).
Please keep your ID and password safe.
Step1: ID creation
Click "Create ID here" on the dedicated page for Test you are taking.
Step2: Check the precautions
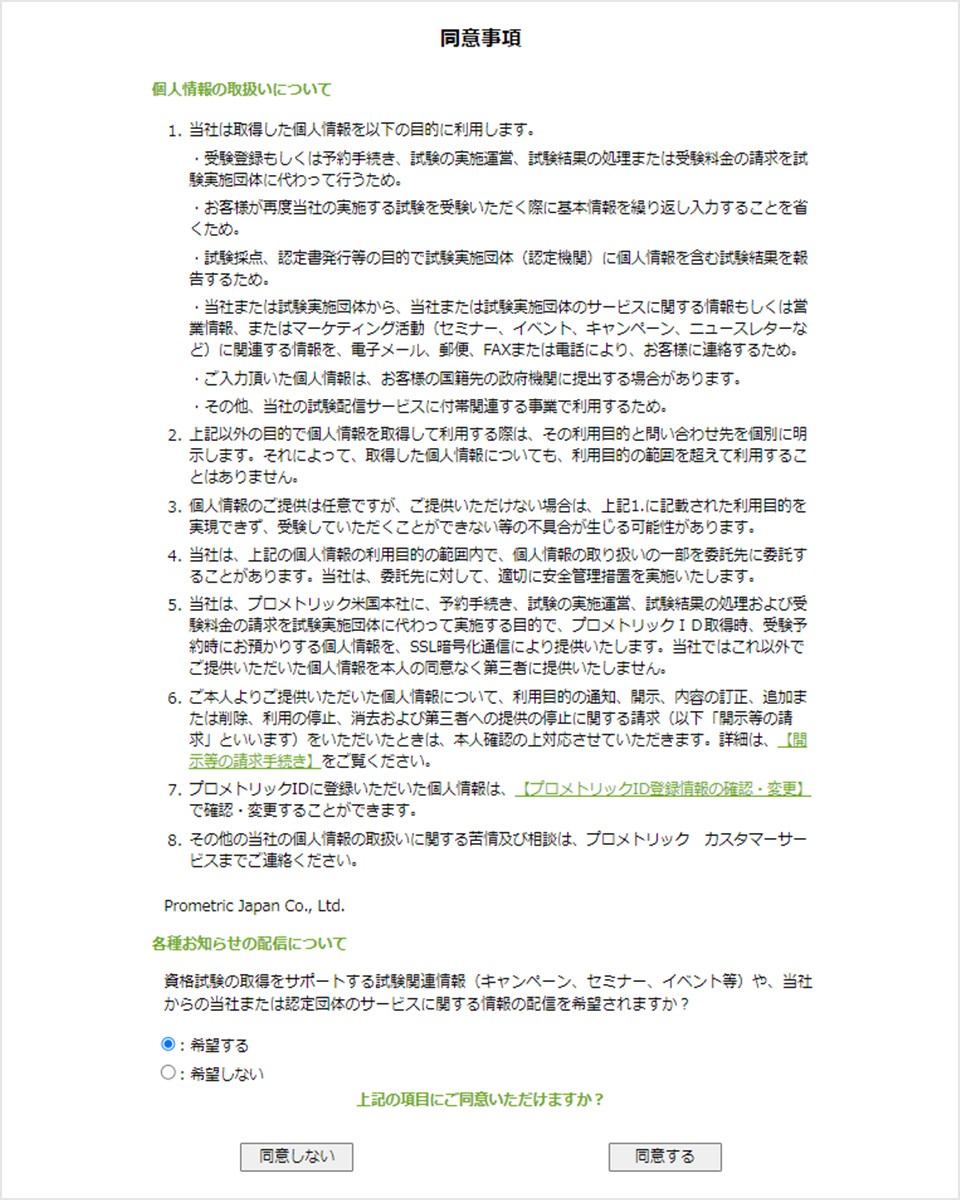
Step3: Confirm consent terms
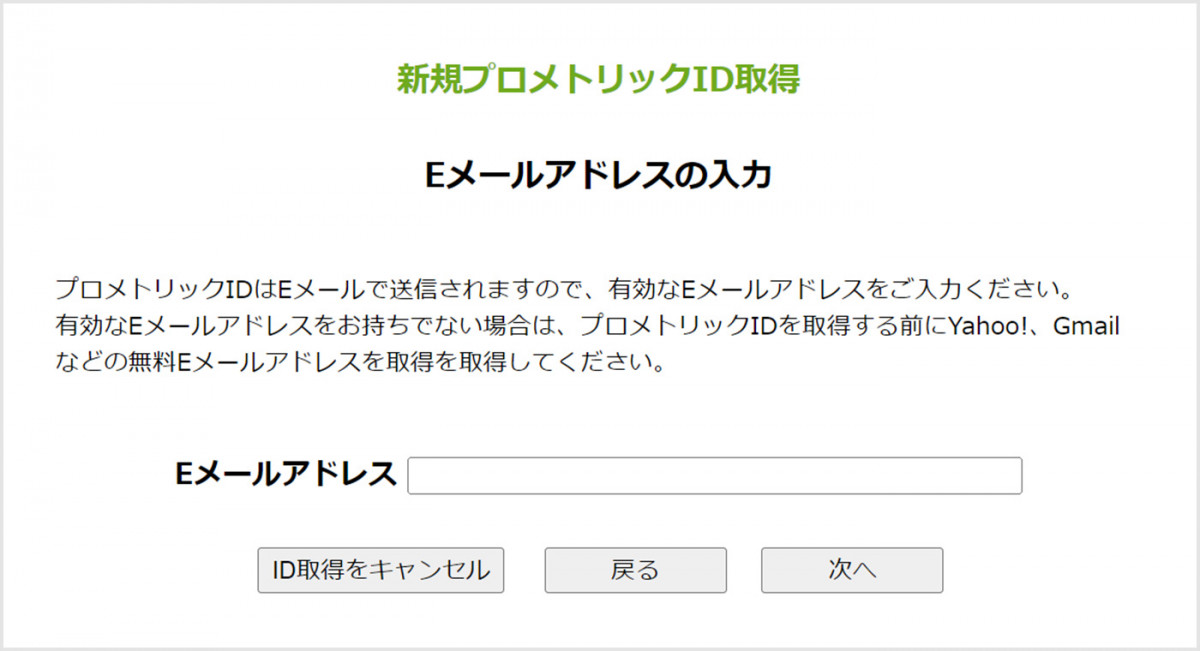
Step4: Register your email address
Please enter a valid email address.
If you have already created Prometric ID, the ID will be sent to your registered email address.
Step 5: Confirm email address
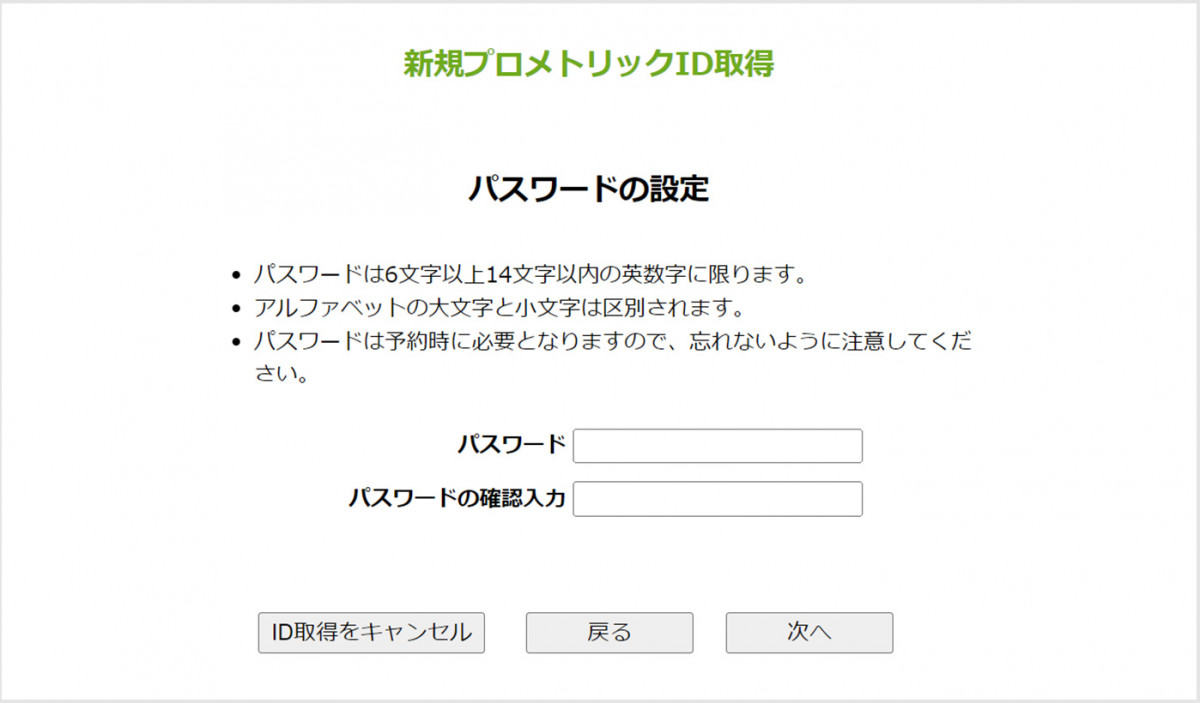
Step6: Password setting
Please enter your password between 6 and 14 alphanumeric characters.
Uppercase and lowercase letters of the alphabet are distinguished.
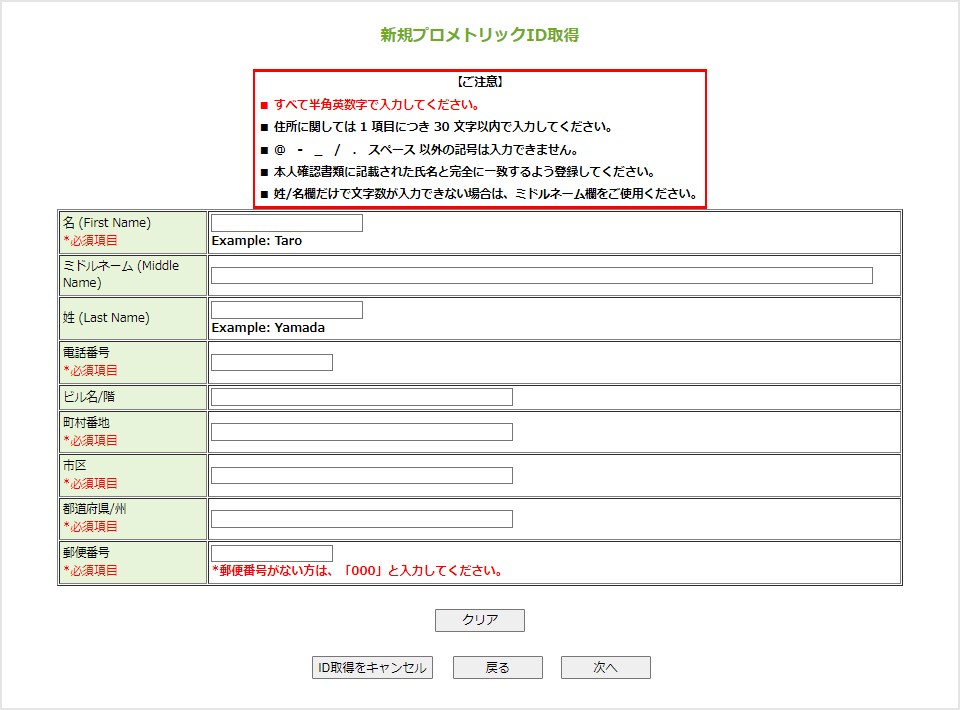
Step7: Enter personal information
Please enter your name, phone number, and address.
Please enter all half-width alphanumeric characters.
Please enter the address within 30 characters for each item.
Symbols other than @, _ / . Space cannot be entered.
Please make sure that your name exactly matches the name written on Identification Document.
If you cannot enter the number of characters in the first name/last name field, please use the middle name field.
For more information on entering your name, please see "Notes on creating Prometric ID."
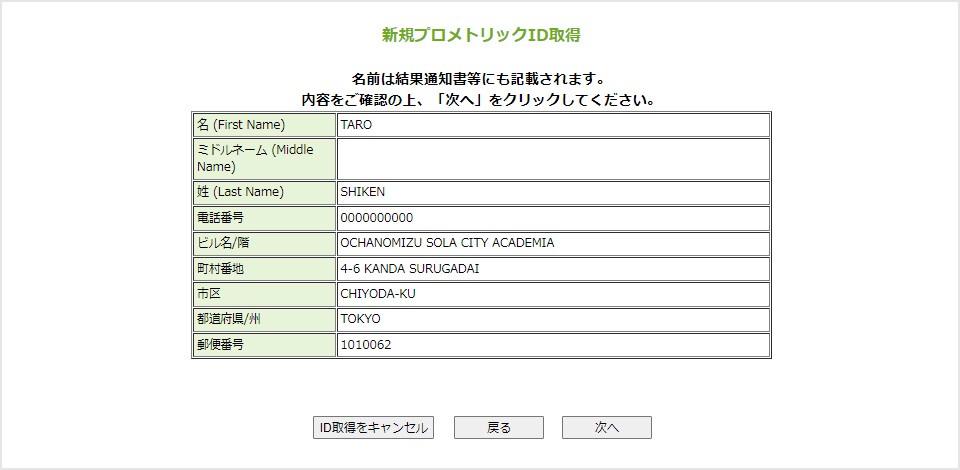
Step8: Confirm input contents
Step9: Registration completed
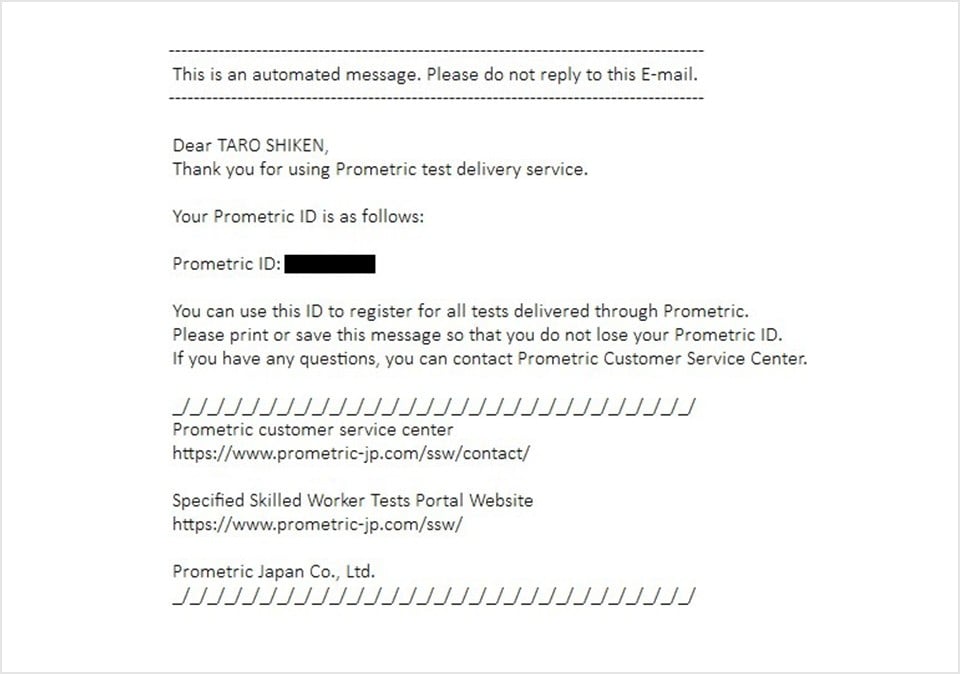
Step10: Prometric ID confirmation
Please check Prometric ID written in the email sent from "[email protected]".
Test Scheduling
Step 1: Taking a photo of your face (if taking the exam in Japan)
If you are taking the test in Japan, a photograph of your face is required to reserve the test. Please check the regulations for valid facial photos and prepare a facial photo.
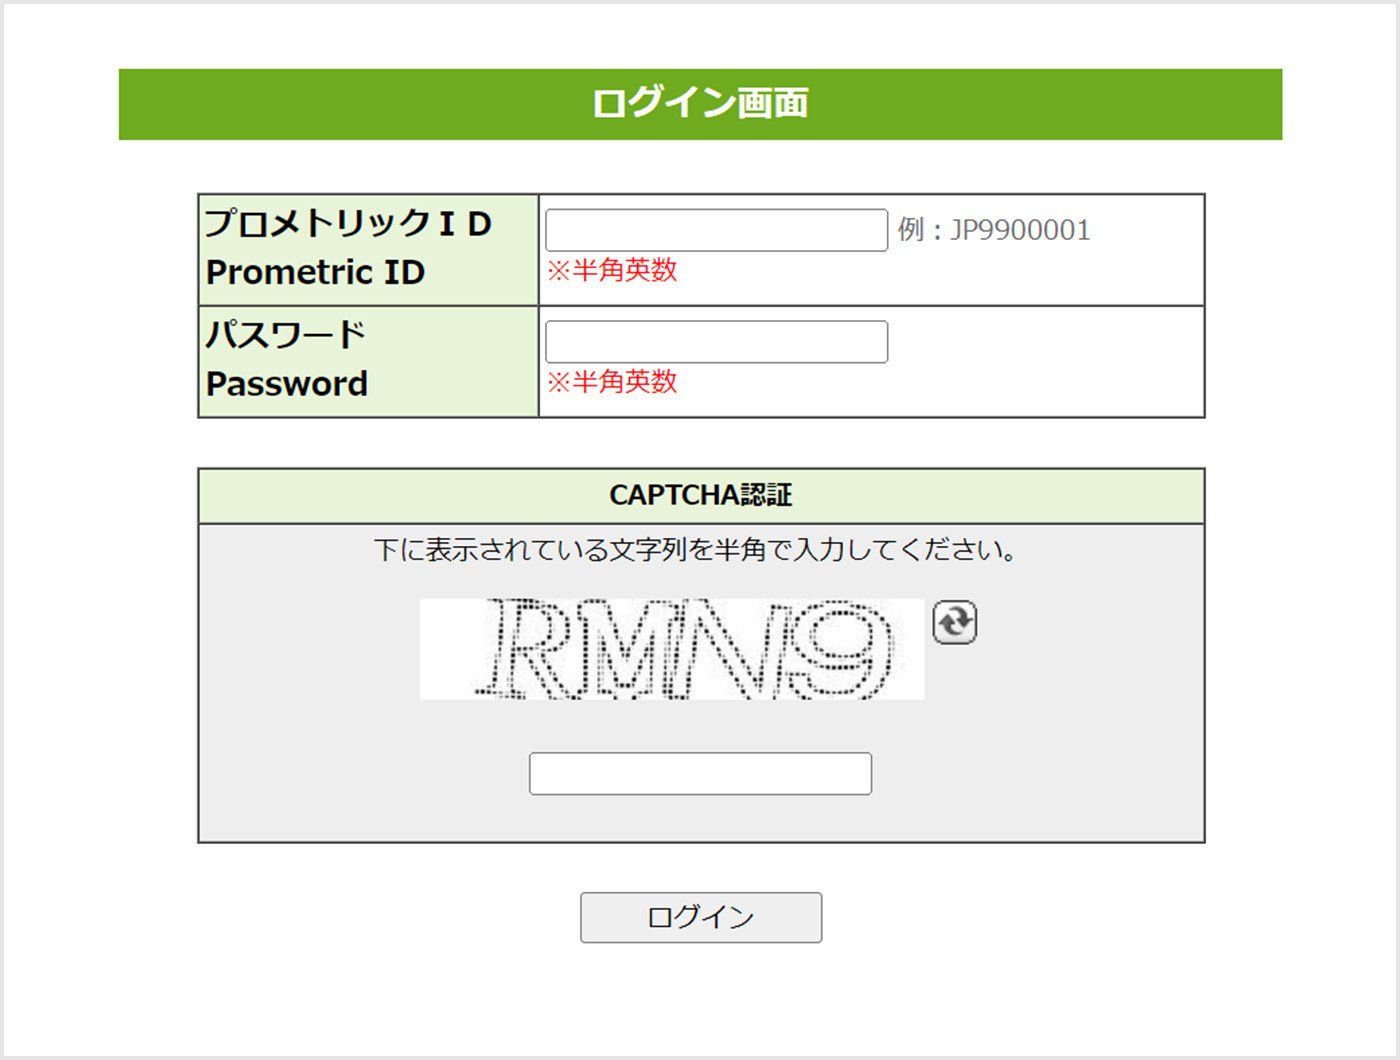
Step2: Login
You can go to the login screen by clicking "Login" on the dedicated page for each exam.
On the login screen, enter Prometric ID, password, and the displayed CAPTCHA authentication using half-width alphanumeric characters.
If you do not have a Prometric ID, please create one first.
Step3: Test reservation
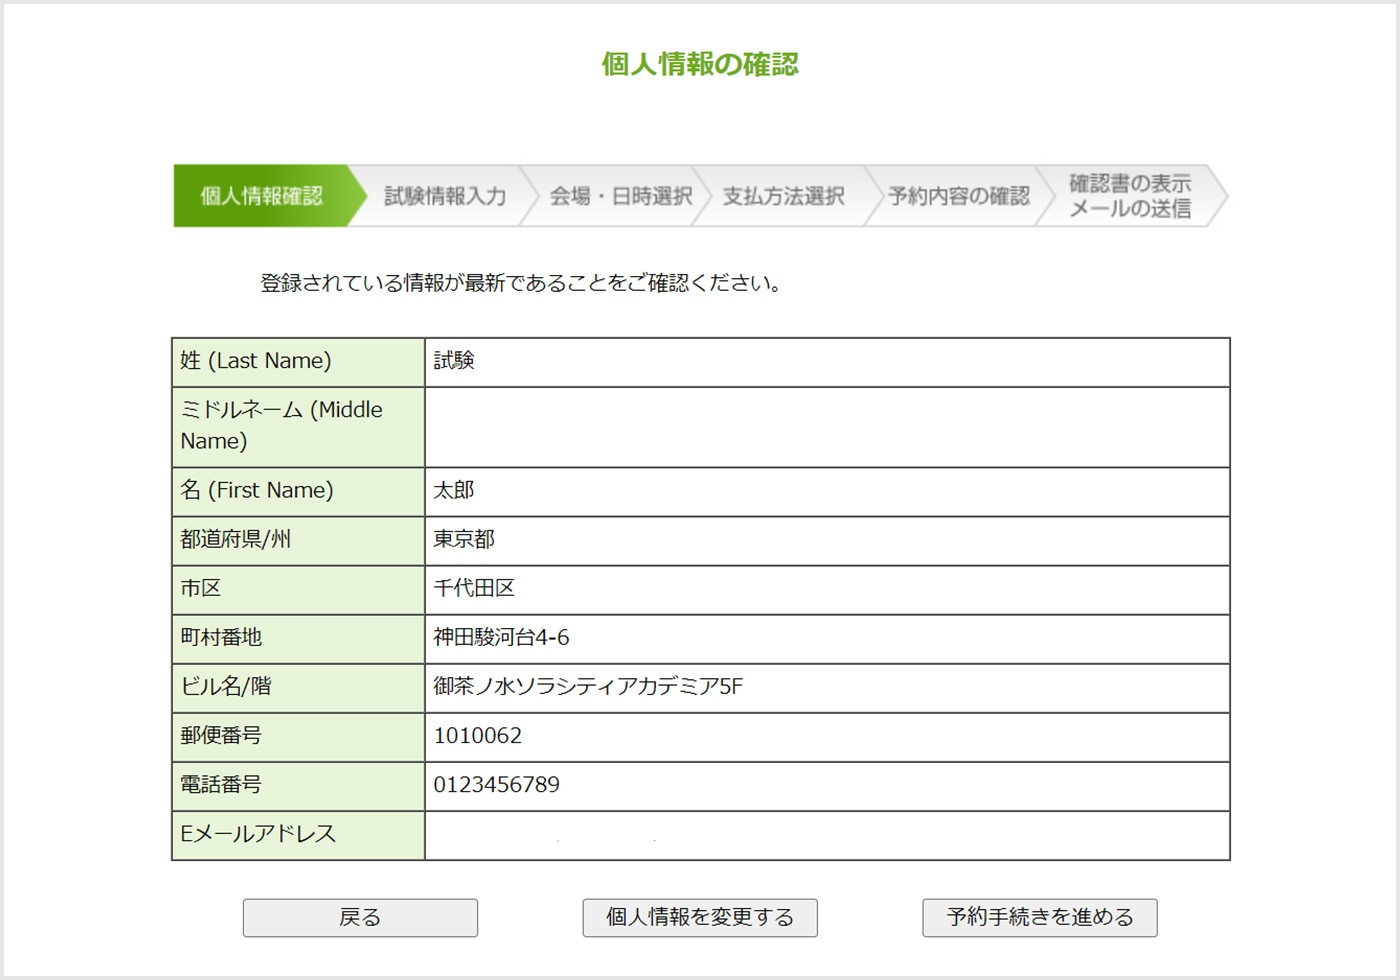
Step 4: Confirm registration information/agreements
Please confirm your agreement to the test terms and conditions and Prometric ID registration information.
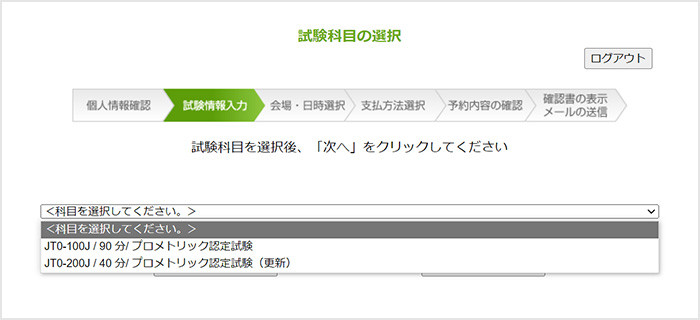
Step5: Exam selection
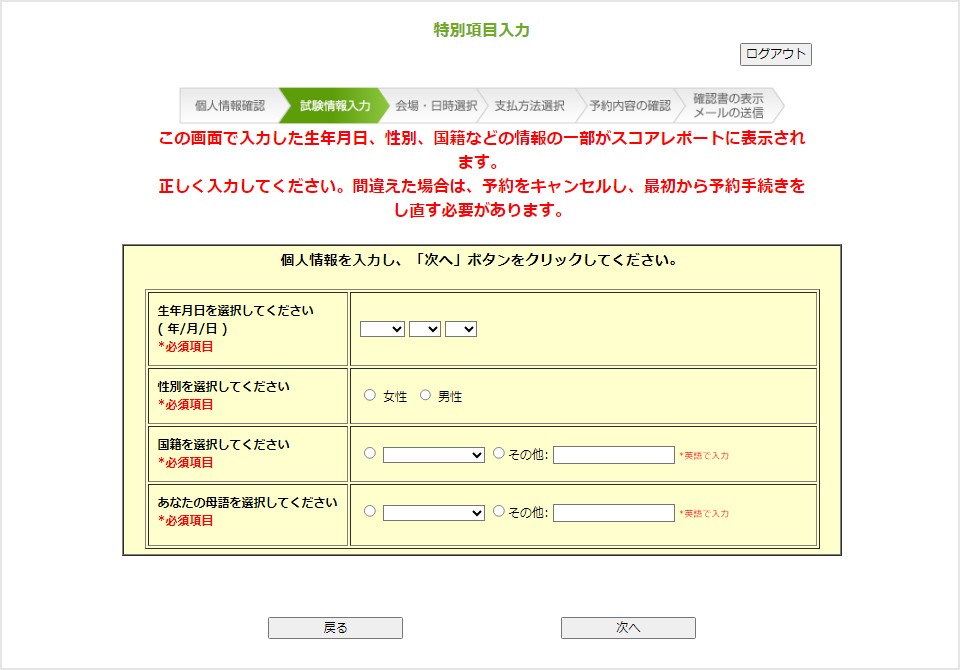
Step6: Special item input
Some of the information you entered (date of birth, gender, nationality, etc.) will be displayed in your score report, so please make sure to enter it correctly.
If you make a mistake, you will need to cancel your reservation and start the reservation process all over again.
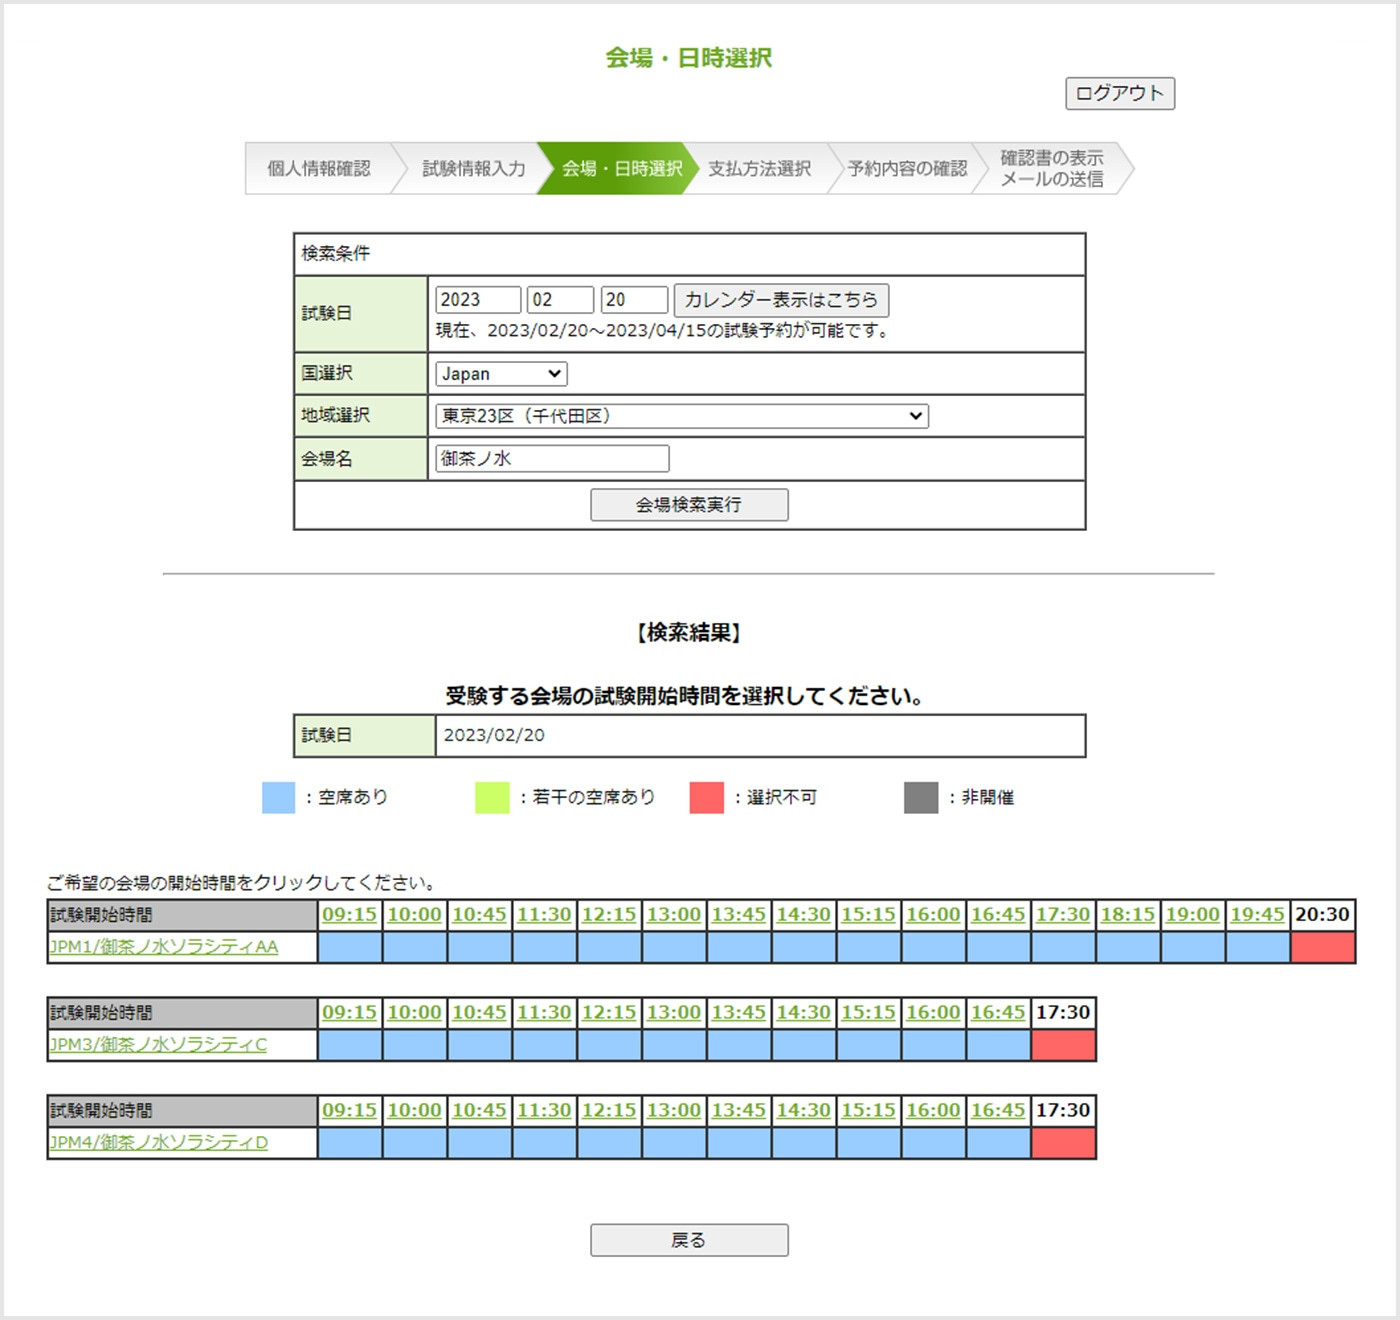
Step7: Date/time/ Test Center search
Select the desired test date and region and click "Execute Test Center Search" to display Test Center test is being held and the availability of seats.
Seat availability is displayed by color according to the exam start time. Please select the exam start time for your desired Test Center.
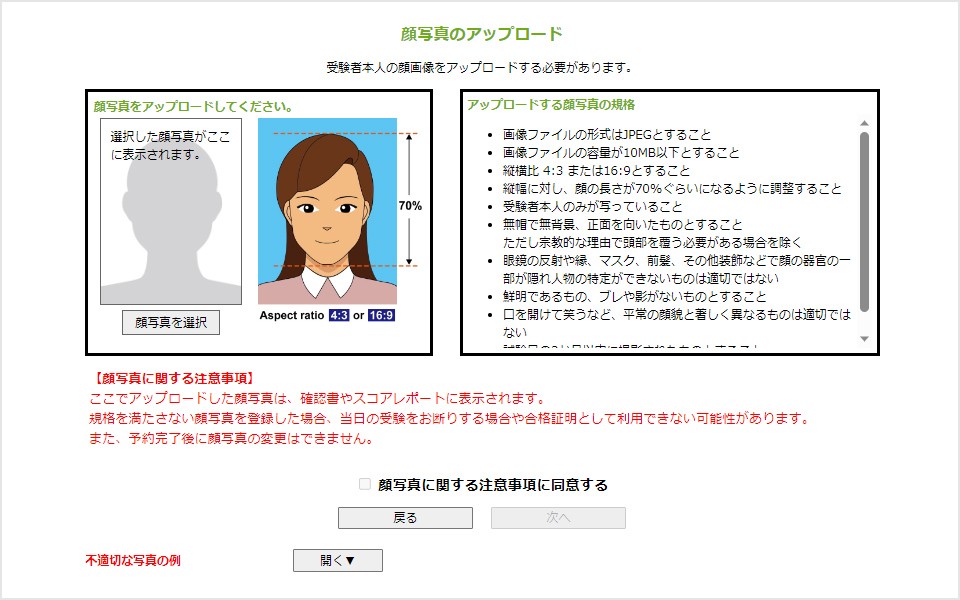
Step 8: Upload your face photo (if taking the exam in Japan)
If you are taking the test in Japan, you will need to upload a photo of Candidate that will appear on Confirmation Letter and score report.
If you register a face photo that does not meet the standards, you may be refused the test on the day of the test or may not be able to use it as proof of passing.
Also, you cannot change your face photo after the reservation is completed.
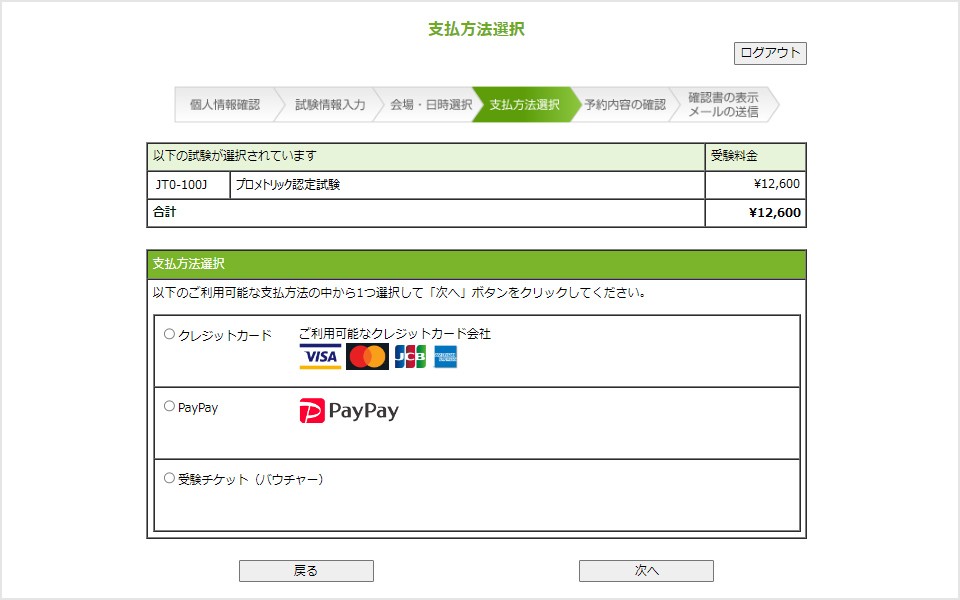
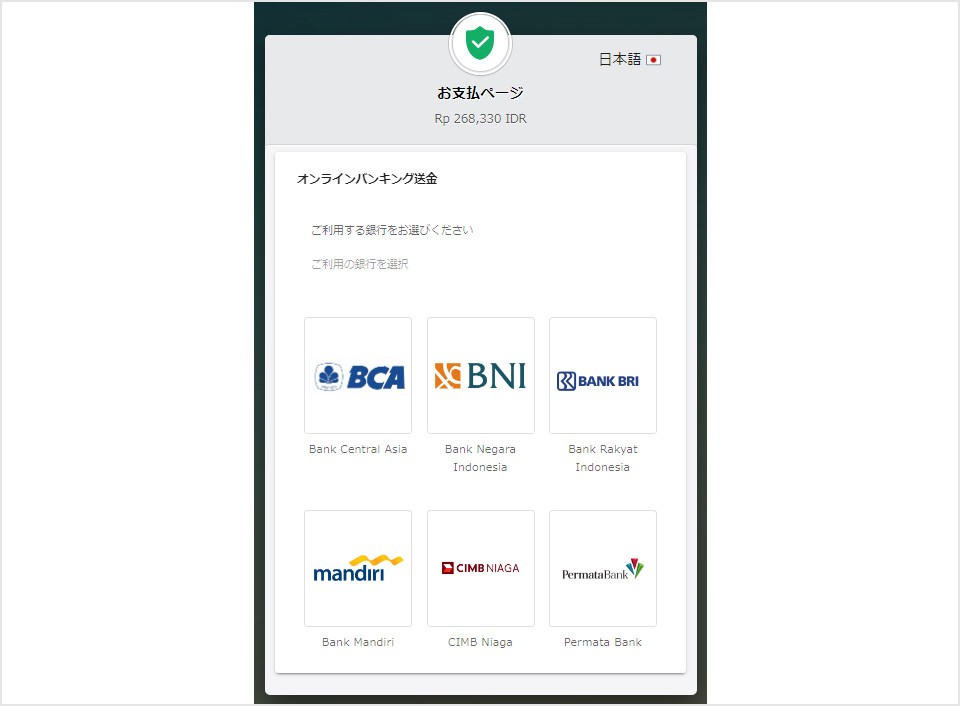
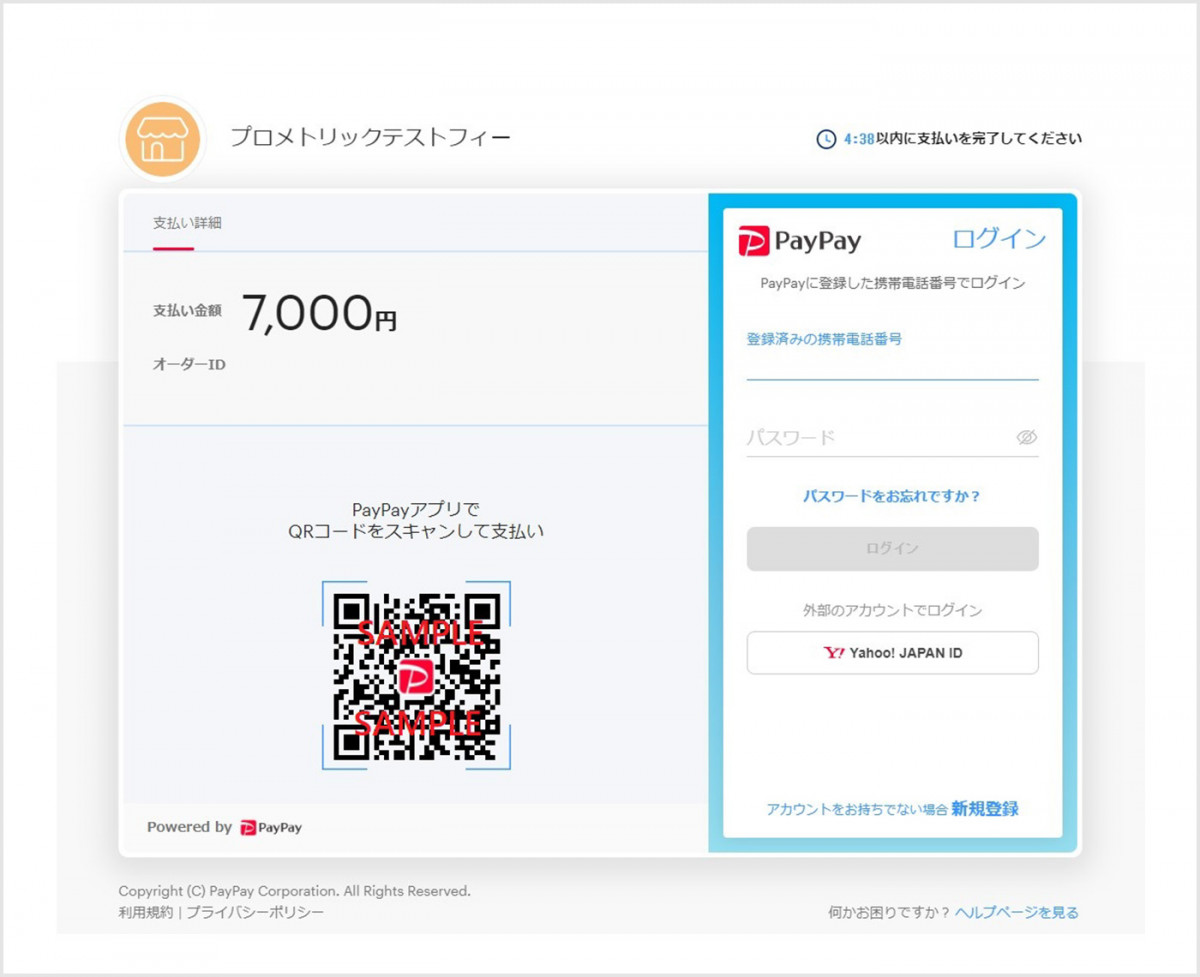
Step9: Payment method selection
The available payment methods will be displayed.
The payment methods you can choose differ depending on the country where you are taking the test. For more information, please see "Payment methods by country".
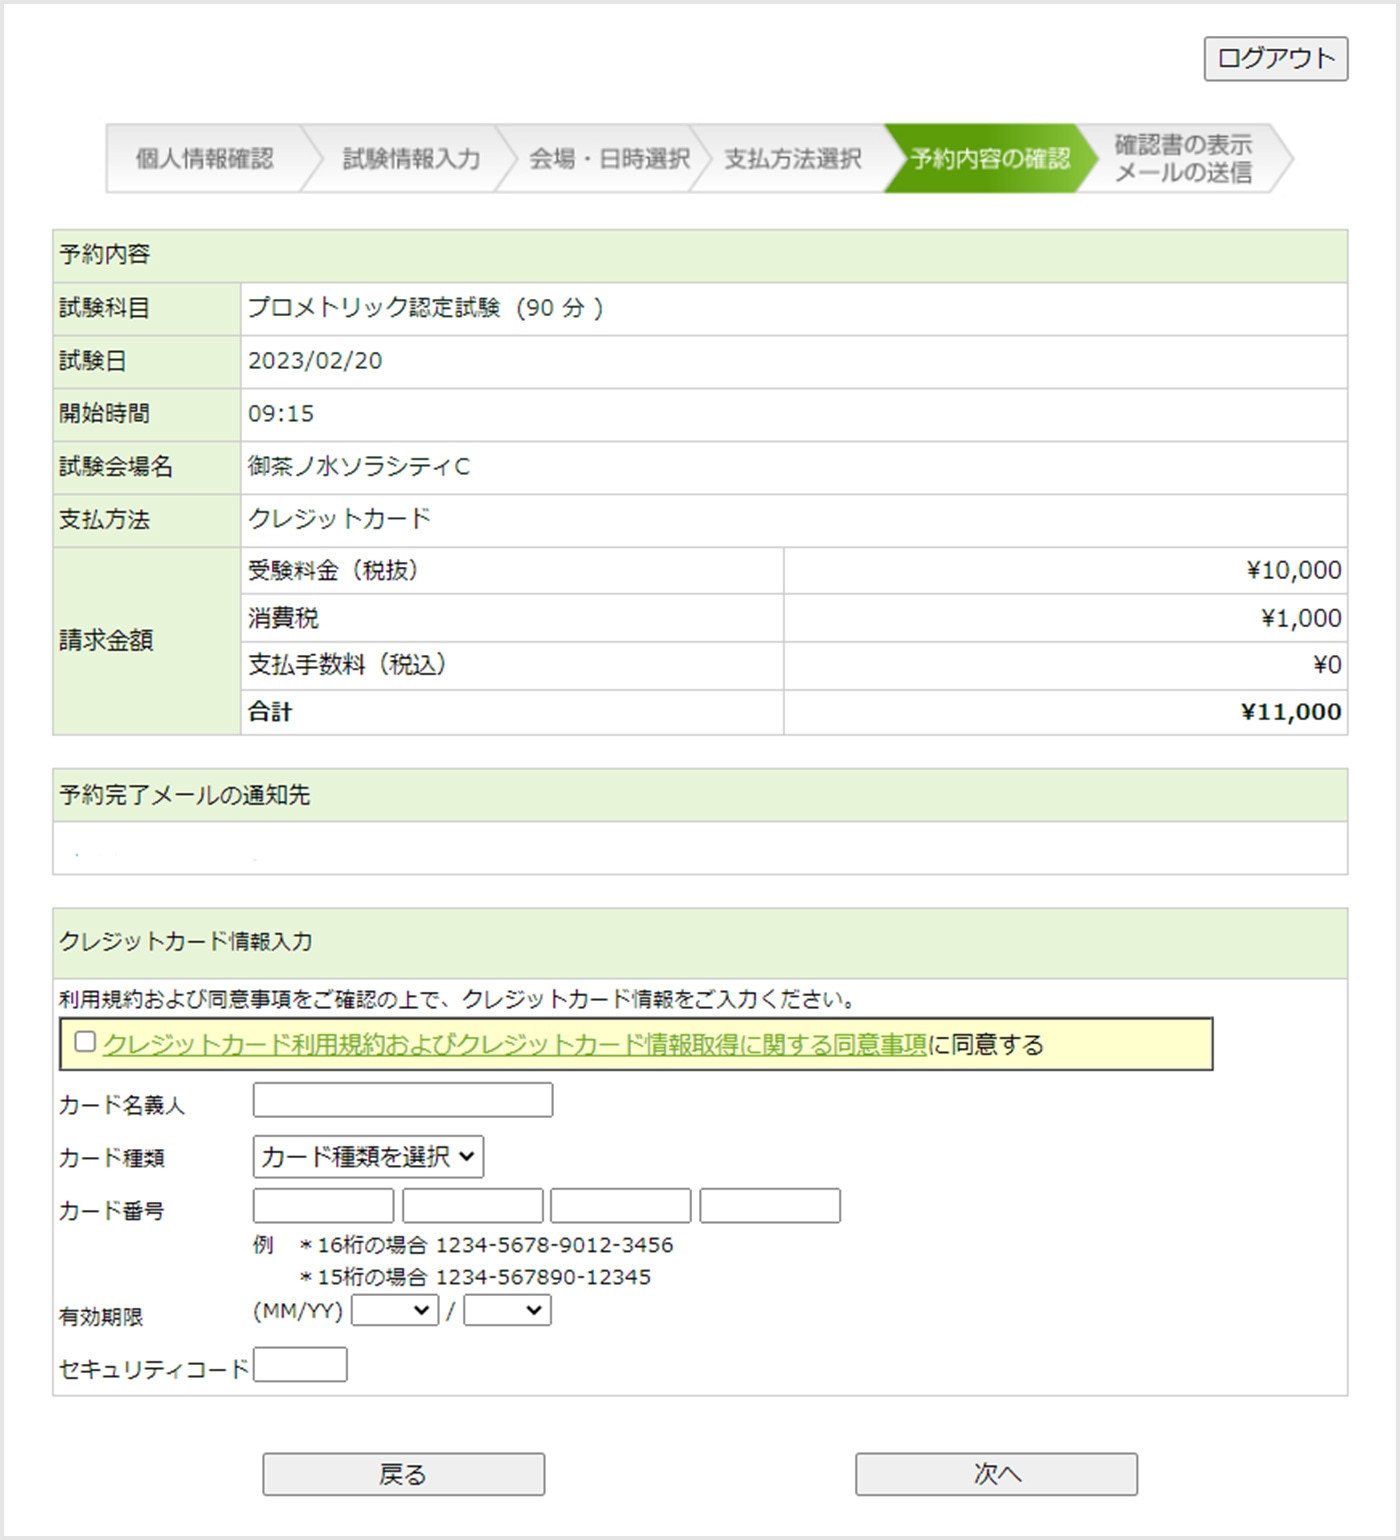
When using a credit card
Please check the terms of use and agreement before entering your card information.
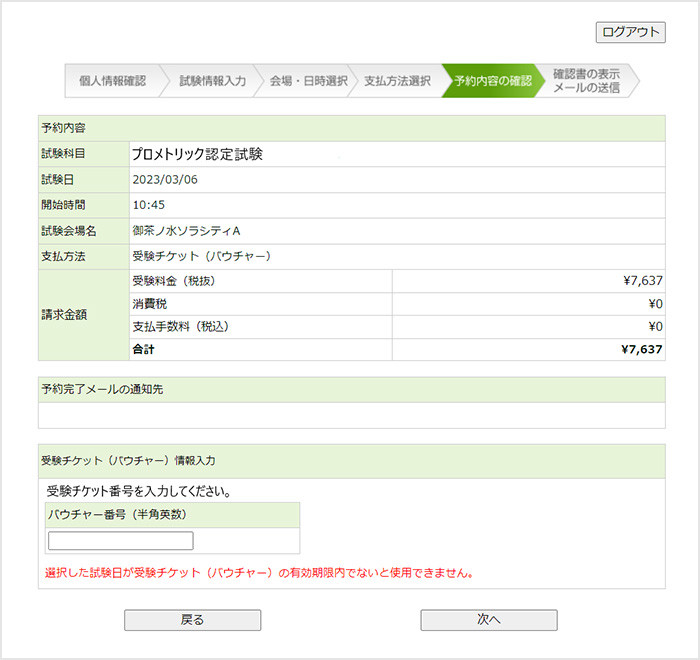
If using Voucher
Please enter your Voucher number.
If the expiration date has passed, it cannot be used.
Step10: Reservation completed
Once payment is complete, your reservation is complete.
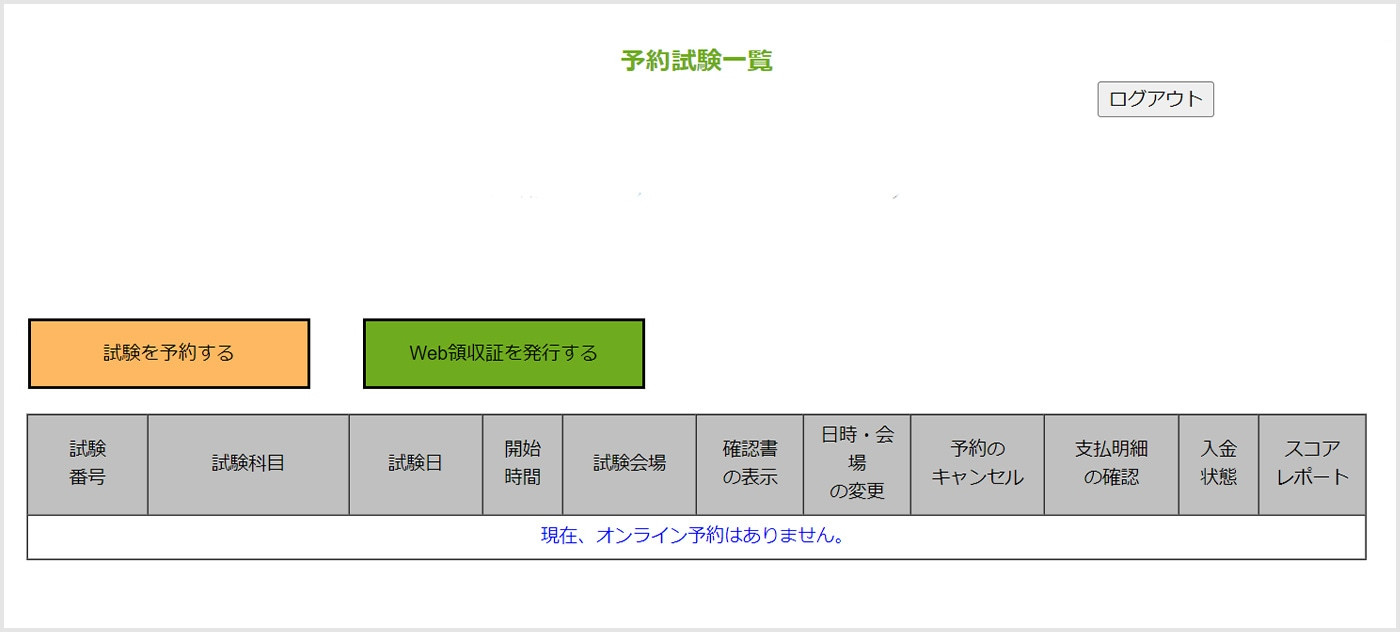
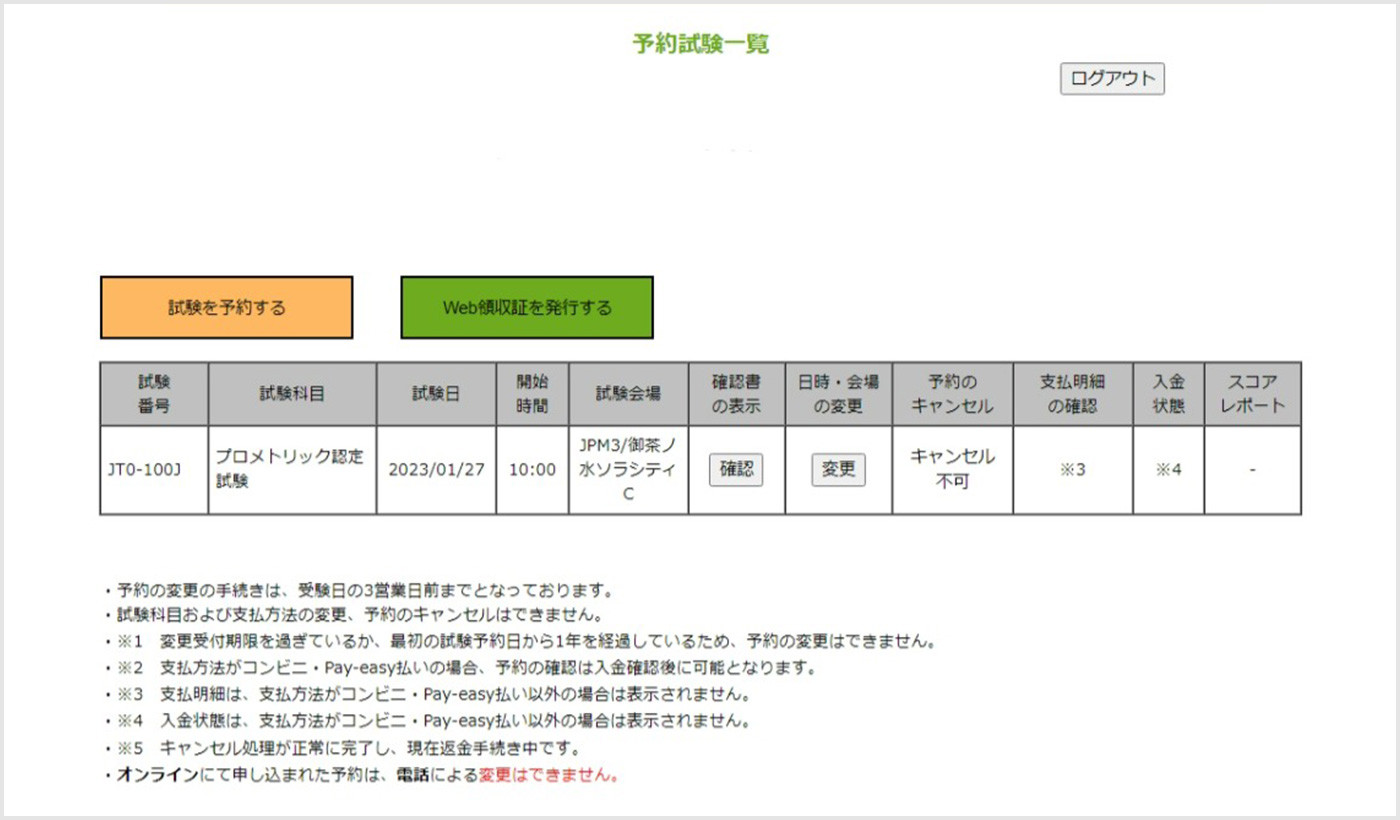
After logging in, you can check your reserved exams on the screen.
You can view Confirmation Letter, change reservation details, cancel, etc.
If you take the test in Japan, you can receive a web receipt after taking the test.
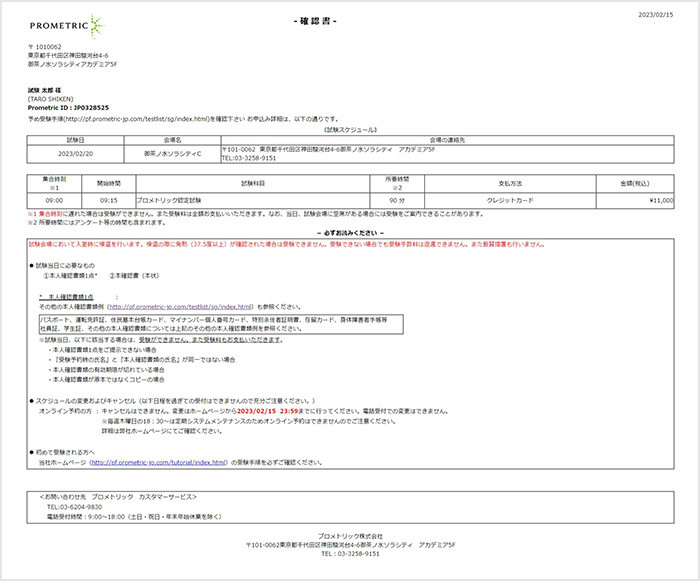
Confirmation Letter
You can print out Confirmation Letter that includes your test reservation details, what to bring on the day, and a map of Test Center.


