ID creation/ Scheduling procedure
We will guide you through the steps to create an ID, reserve, change, and cancel your exam.
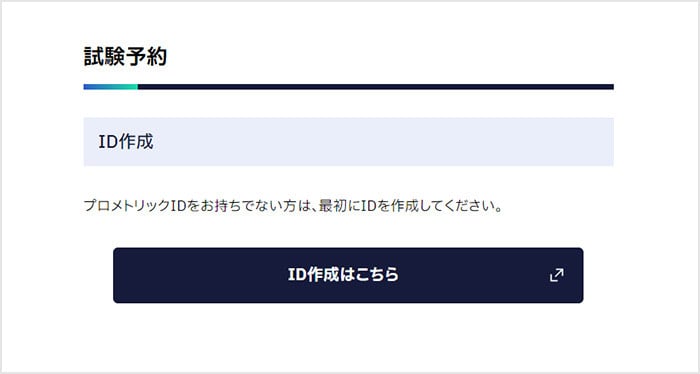
Prometric ID is required to schedule an exam. If you do not have a Prometric ID, please create one first.
ID creation
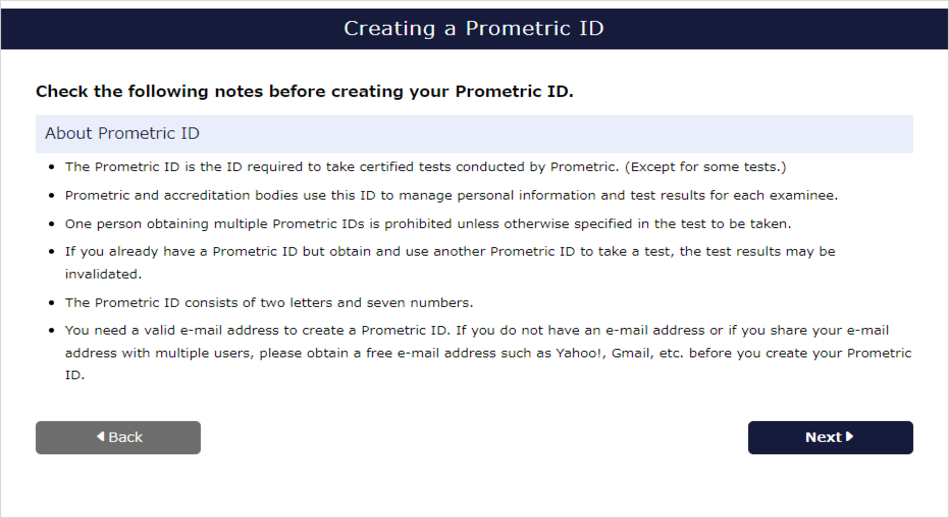
The ID you create can be used for all exams conducted by Prometric (with the exception of some exams).
Please keep your ID and password safe.
Step1: ID creation
Click "Create ID here" on the dedicated page for Test you are taking.


Step2: Check the precautions
Please check the notes on obtaining ID.
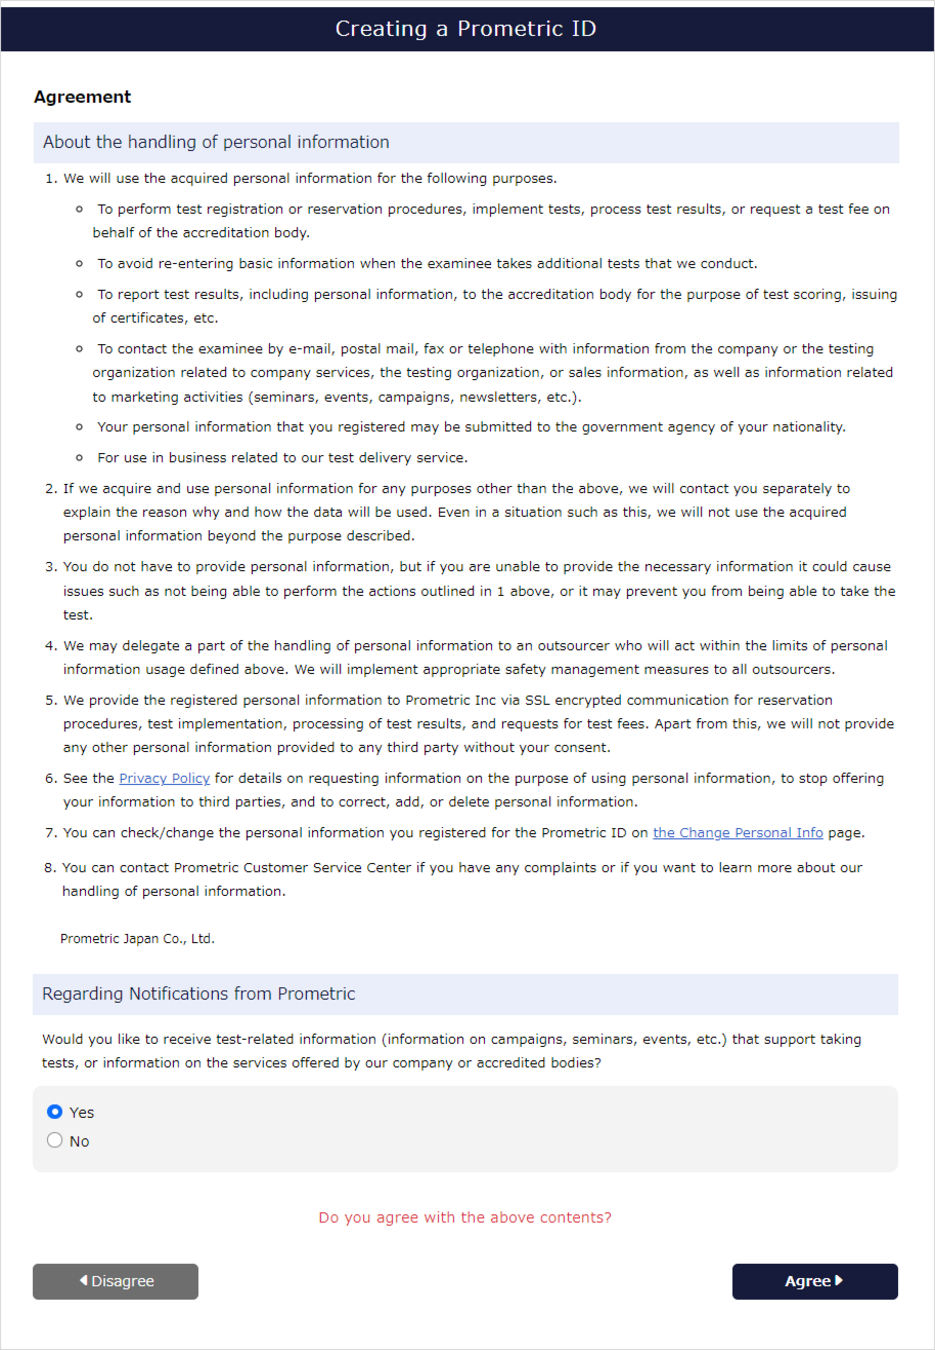
Step3: Confirm consent terms
Please check the terms and conditions for obtaining an ID.
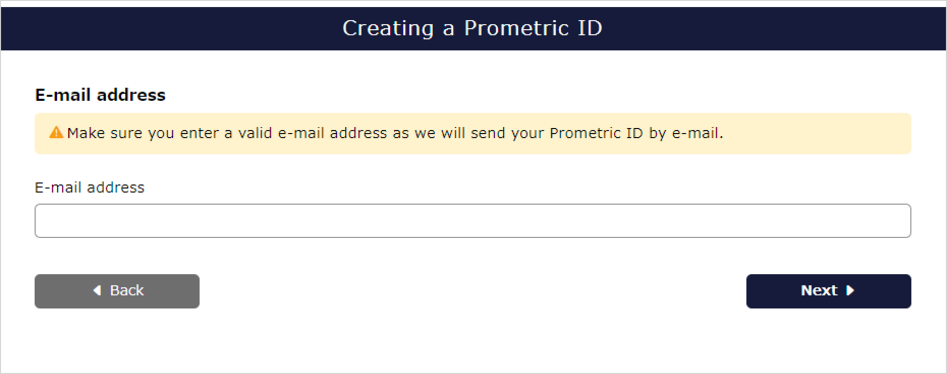
Step4: Register your email address
Please enter a valid email address.
If you have already created Prometric ID, the ID will be sent to your registered email address.
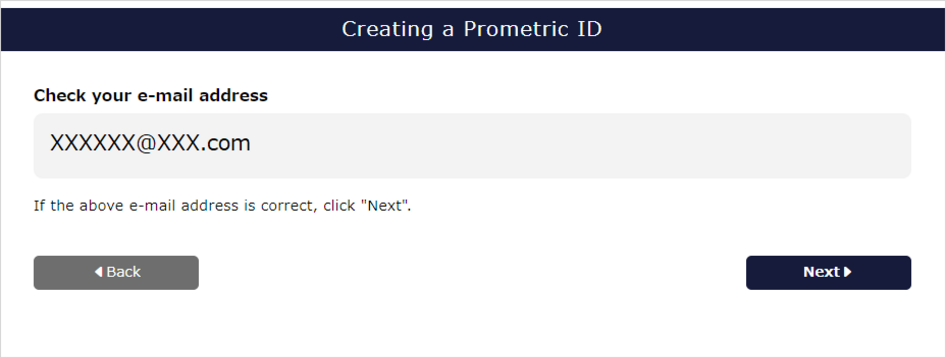
Step 5: Confirm email address
Please check that the email address you entered is correct.
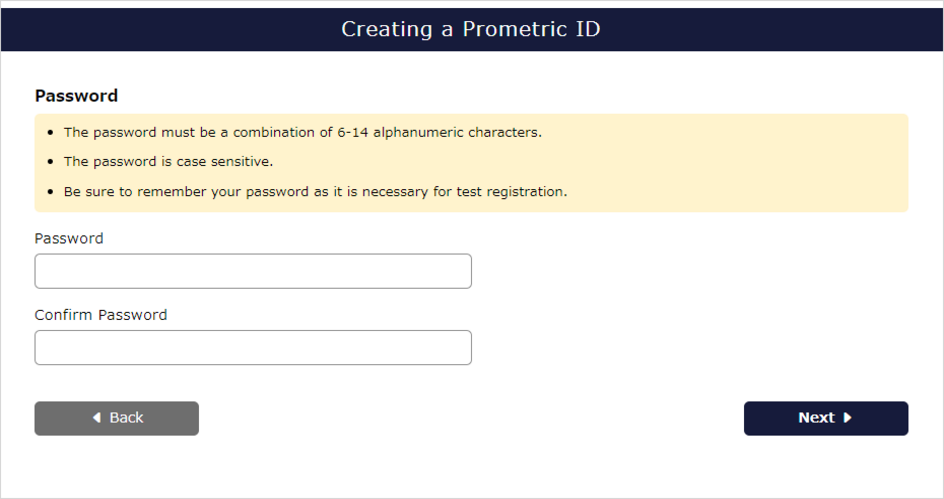
Step6: Password setting
Please enter your password between 6 and 14 alphanumeric characters.
Uppercase and lowercase letters of the alphabet are distinguished.
Step7: Select registered address
Please select the address to register: work or home.
Depending on Test, we may send you a certificate etc.

Step8: Enter personal information
Please enter your name, phone number, and address.
Please enter only full-width kana characters and half-width alphanumeric characters.
You cannot enter symbols other than hyphens, &, ( ), and spaces.

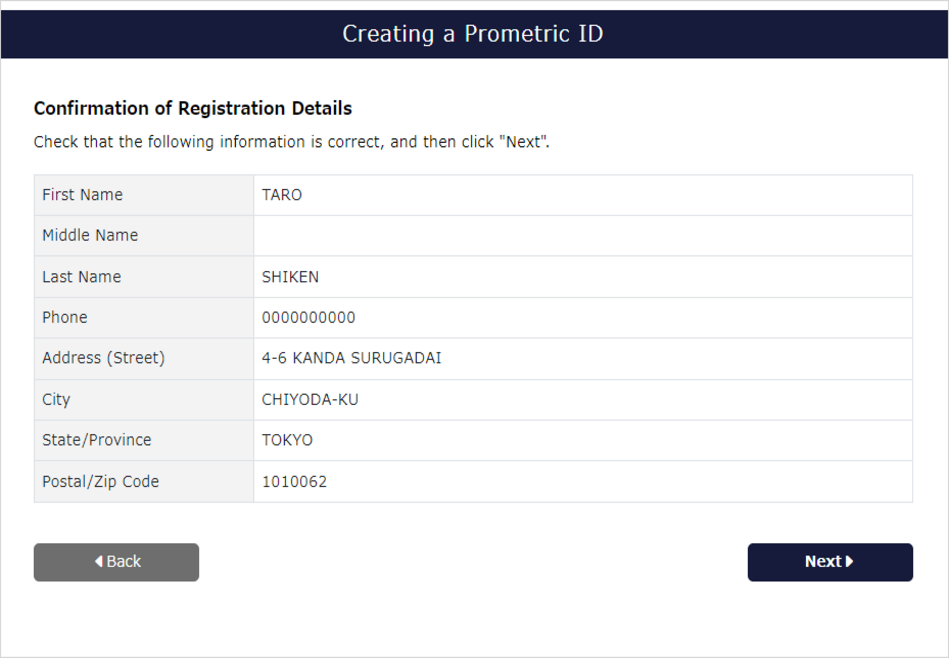
Step9: Confirm input contents
Please check the personal information entered.
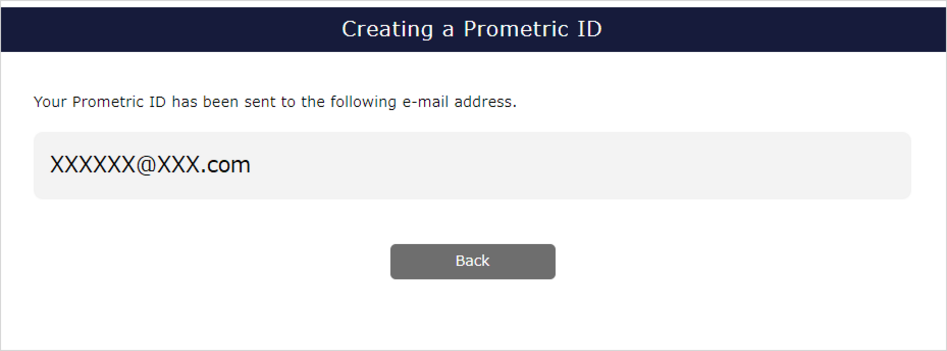
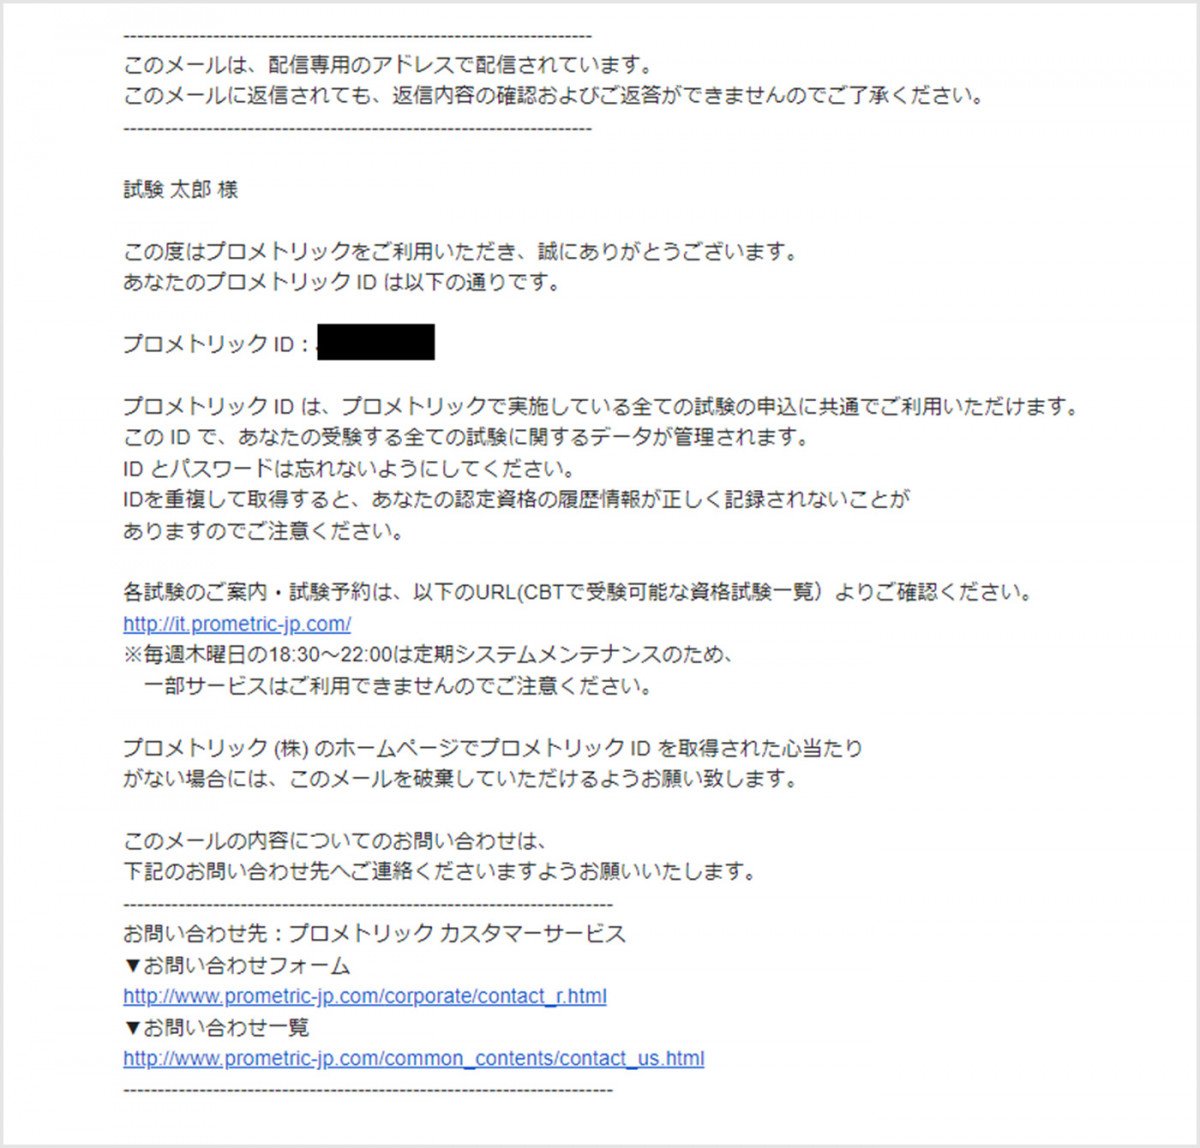
Step10: Registration completed
Prometric ID will be sent to your registered email address.
Step11: Prometric ID confirmation
Please check Prometric ID written in the email sent from "[email protected]".
Test Scheduling
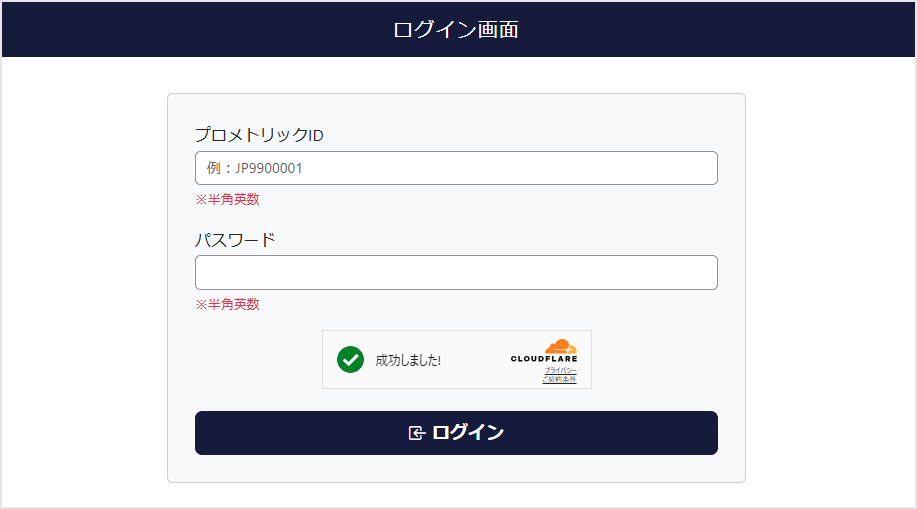
Step1: Login
You can go to the login screen by clicking "Login" on each exam's dedicated page.
If you do not have Prometric ID, please create one first.
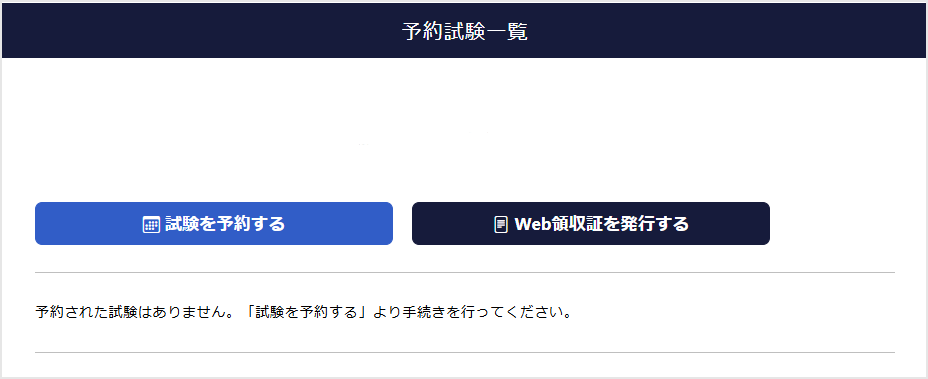
Step2: Test Scheduling
Click "Scheduling Test."
If you have any Test Scheduling, they will be displayed on this screen.
Step 3: Confirm registration information/agreements
Please confirm your agreement to the test terms and conditions and Prometric ID registration information.

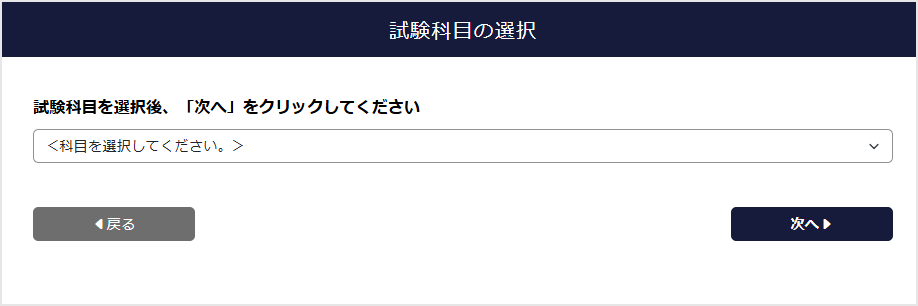
Step4: Test selection
Please select Test you would like Scheduling.
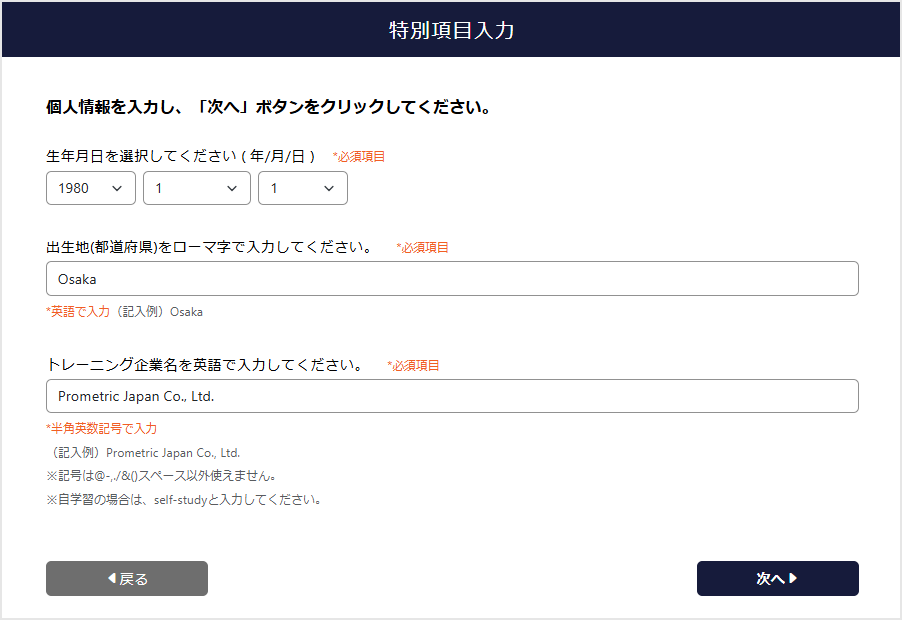
Step5: Special item input
Depending on Test, you may be required to enter special items.
Enter information to confirm questionnaire items and Eligibility specific to each Test.
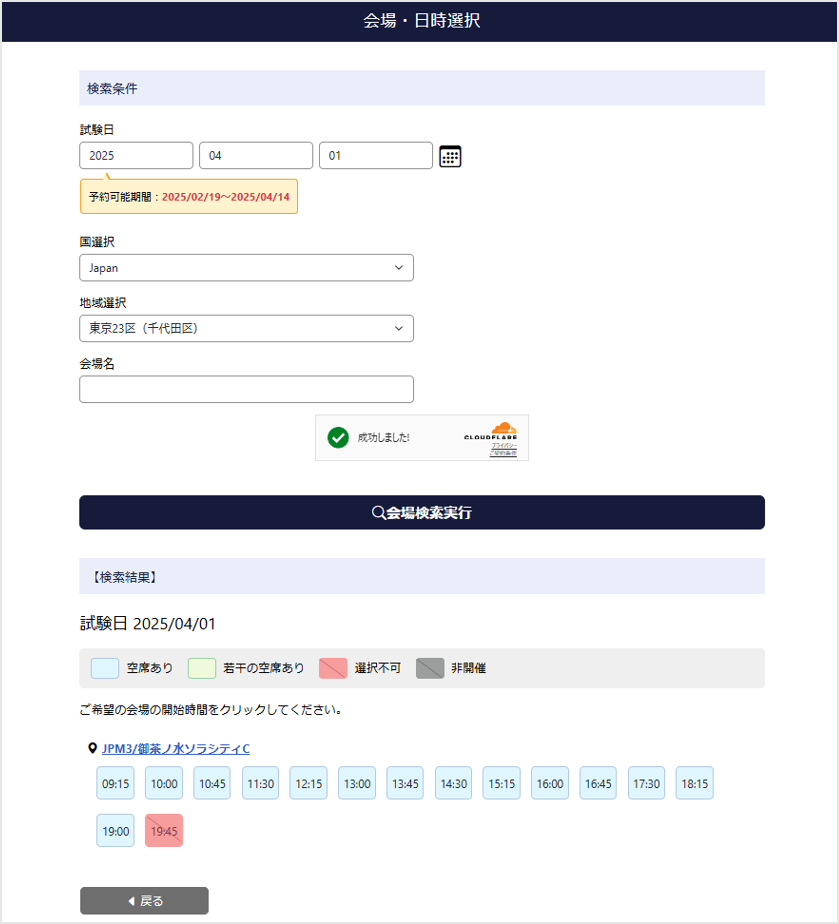
Step 6: Select date, time and Test Center
Select the desired test date and area and click "Search for Test Center" to display available Test Center and available seats.
The available seats are displayed in different colors according to the exam start time. Please select the exam start time of your preferred Test Center.
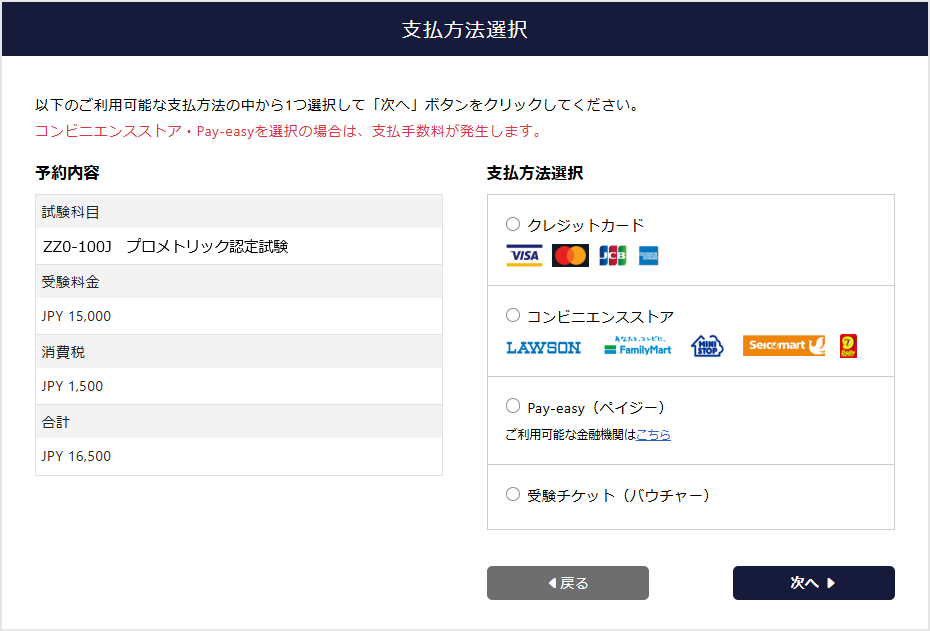
Step7: Payment method selection
The available payment methods will be displayed.
Scheduling /payment deadlines, fees, etc. vary depending on the payment method. For more information, please check "Deadlines and Fees by Payment Method".
This screen will be skipped for Test where there is no payment for Test Fee.
Step 8: Confirm your reservation details
The reservation details will be displayed.
If there are no errors, enter the emergency contact number.

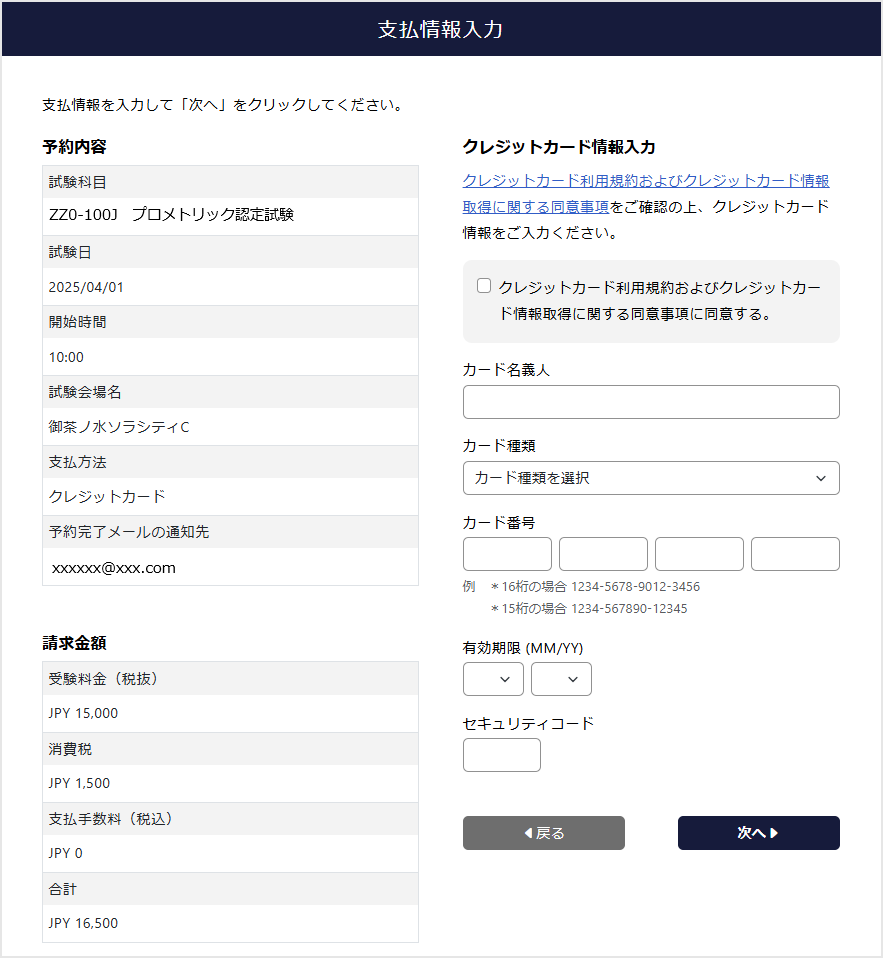
Step 9: Enter payment information
When using a credit card
Please check the terms of use and agreement before entering your card information.
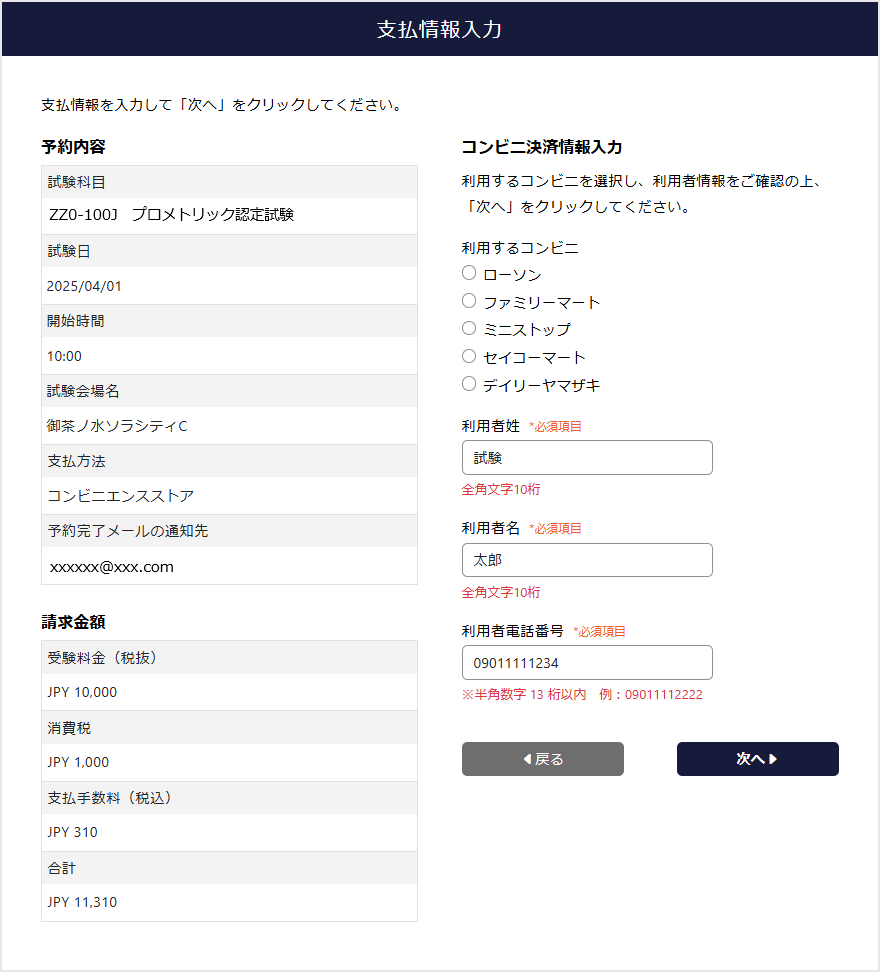
When using a convenience store
Please select the convenience store you wish to use and enter your user information.
Scheduling will be provisional until payment is completed. If payment cannot be confirmed by the payment deadline, the reservation will be automatically canceled.
Payment procedures differ at each convenience store. Please check the on-screen instructions for details.
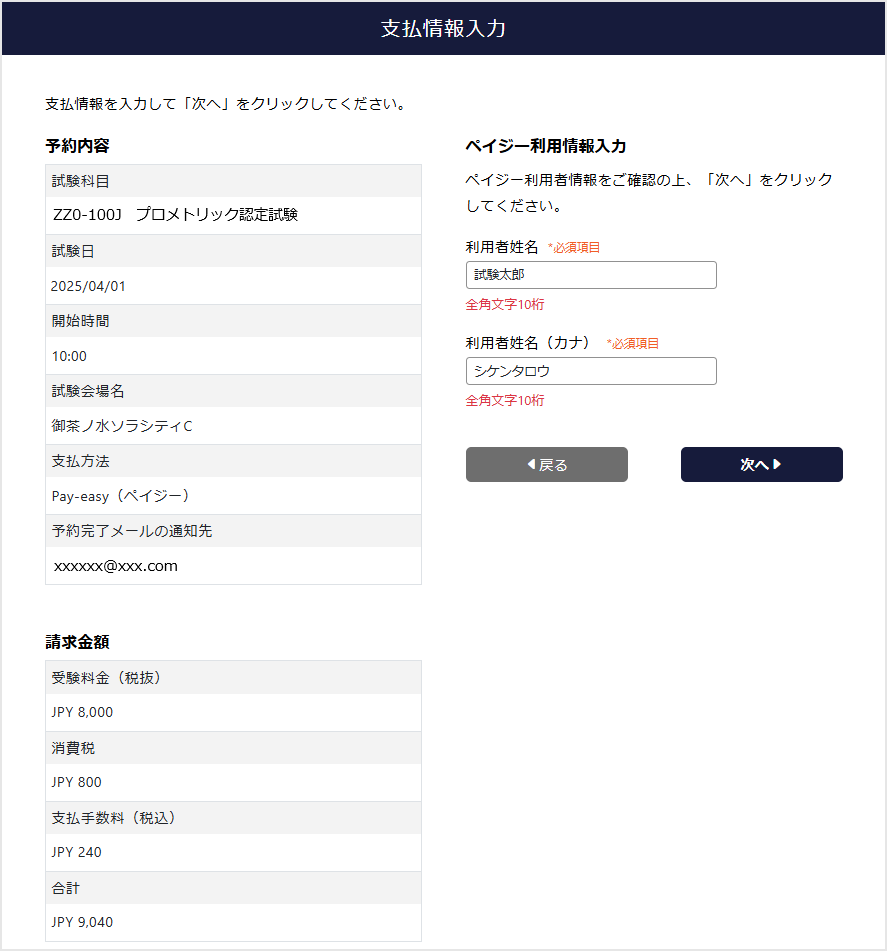
If you use Pay-easy
Please enter your user information.
Your reservation will be provisional until payment is complete. If payment is not confirmed by the payment deadline, your reservation will be automatically canceled.
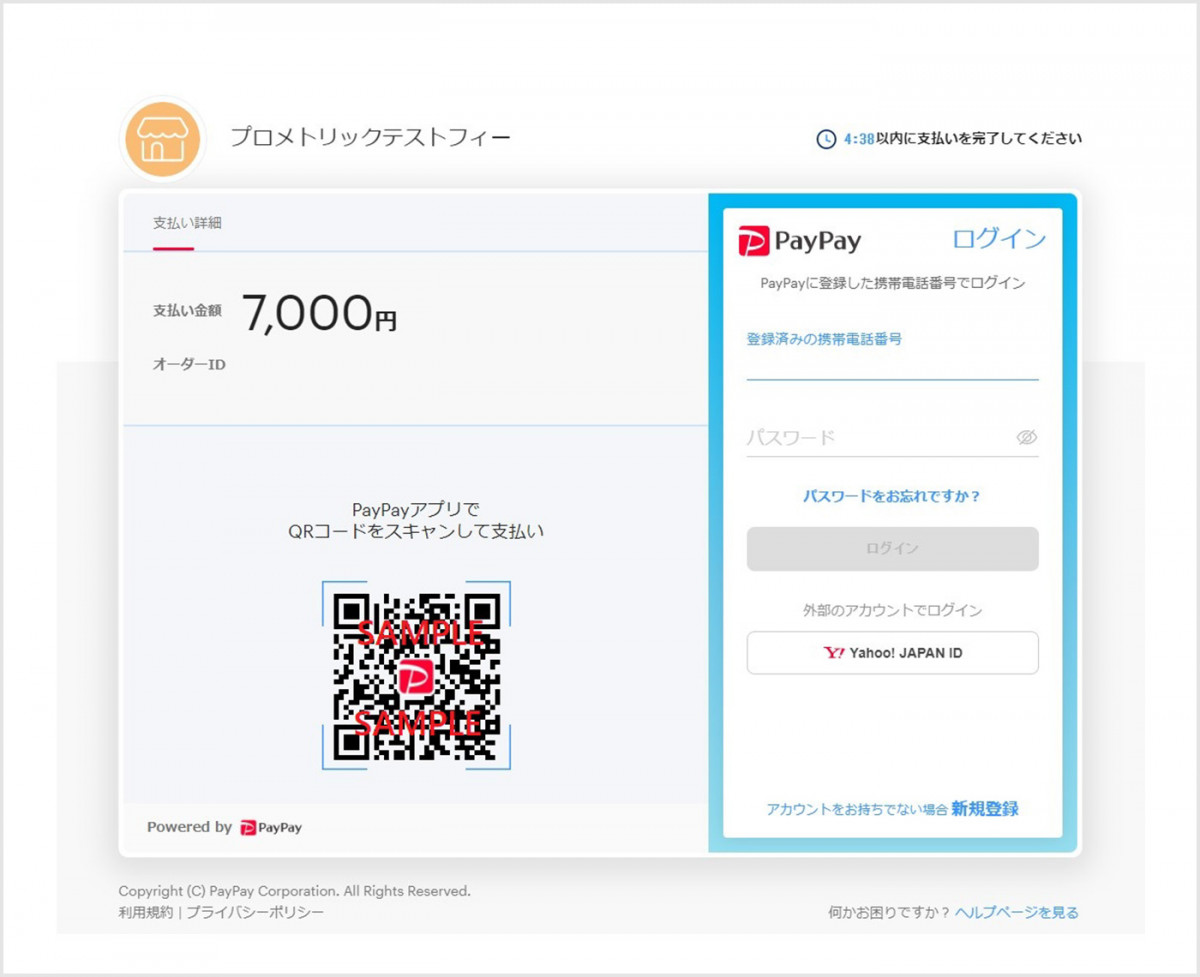
When using QR code payment
Follow the on-screen instructions and scan the QR code.
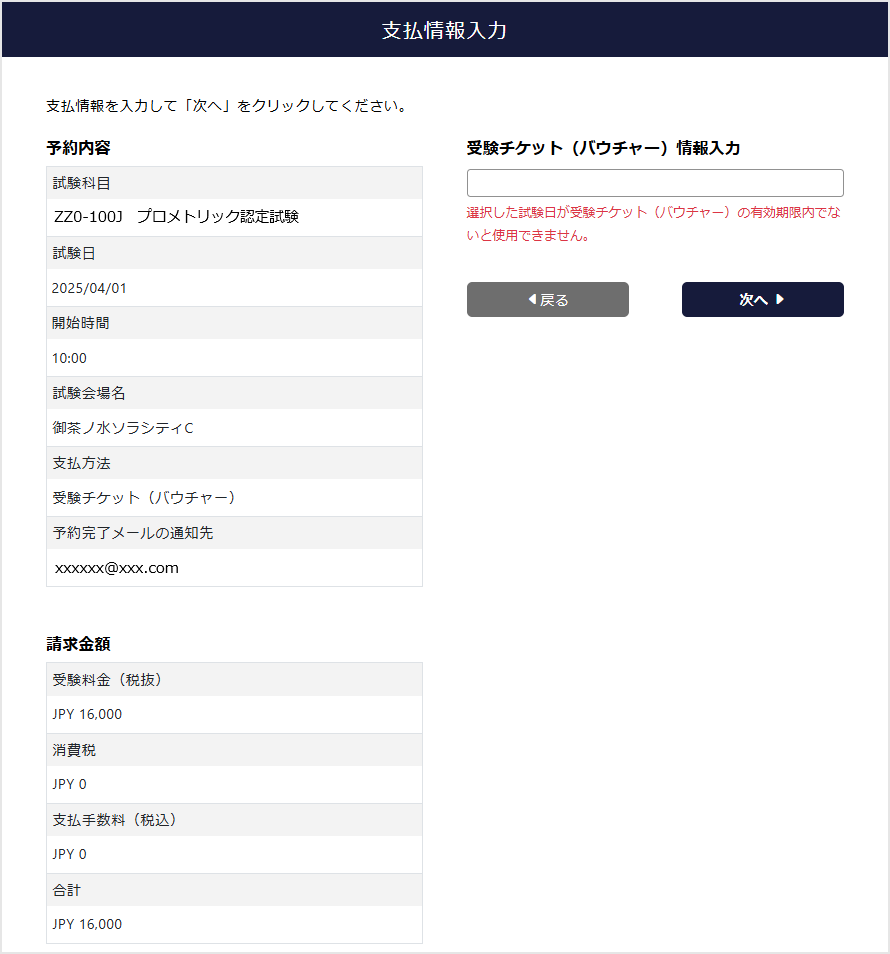
When using an exam ticket
Please enter your exam ticket (Voucher) number.
If the selected test date has expired, it will not be available.
Step10: Reservation completed
Once payment is complete, your reservation is complete.
If you select convenience store or Pay-easy, your reservation will not be completed until we confirm your payment.
After confirming your payment, we will send you an email confirming your payment and completing your reservation.
After logging in, you can check the exams you have booked on the Reserved Test List.
You can view Confirmation Letter, change or cancel your reservation.
After taking the exam, you can issue an online receipt.
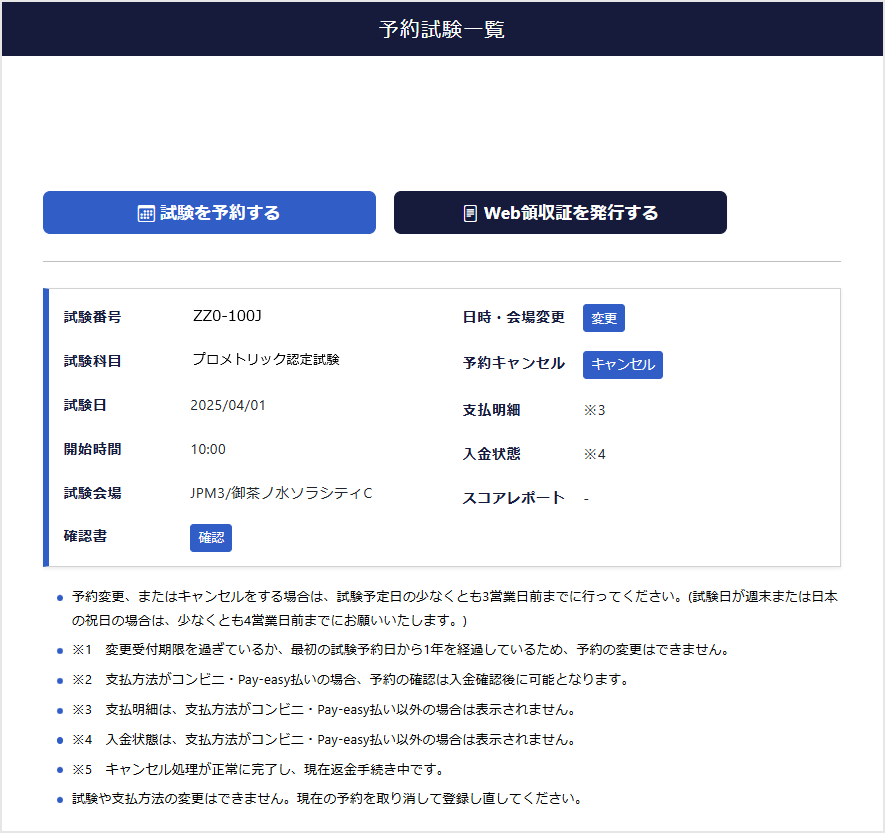
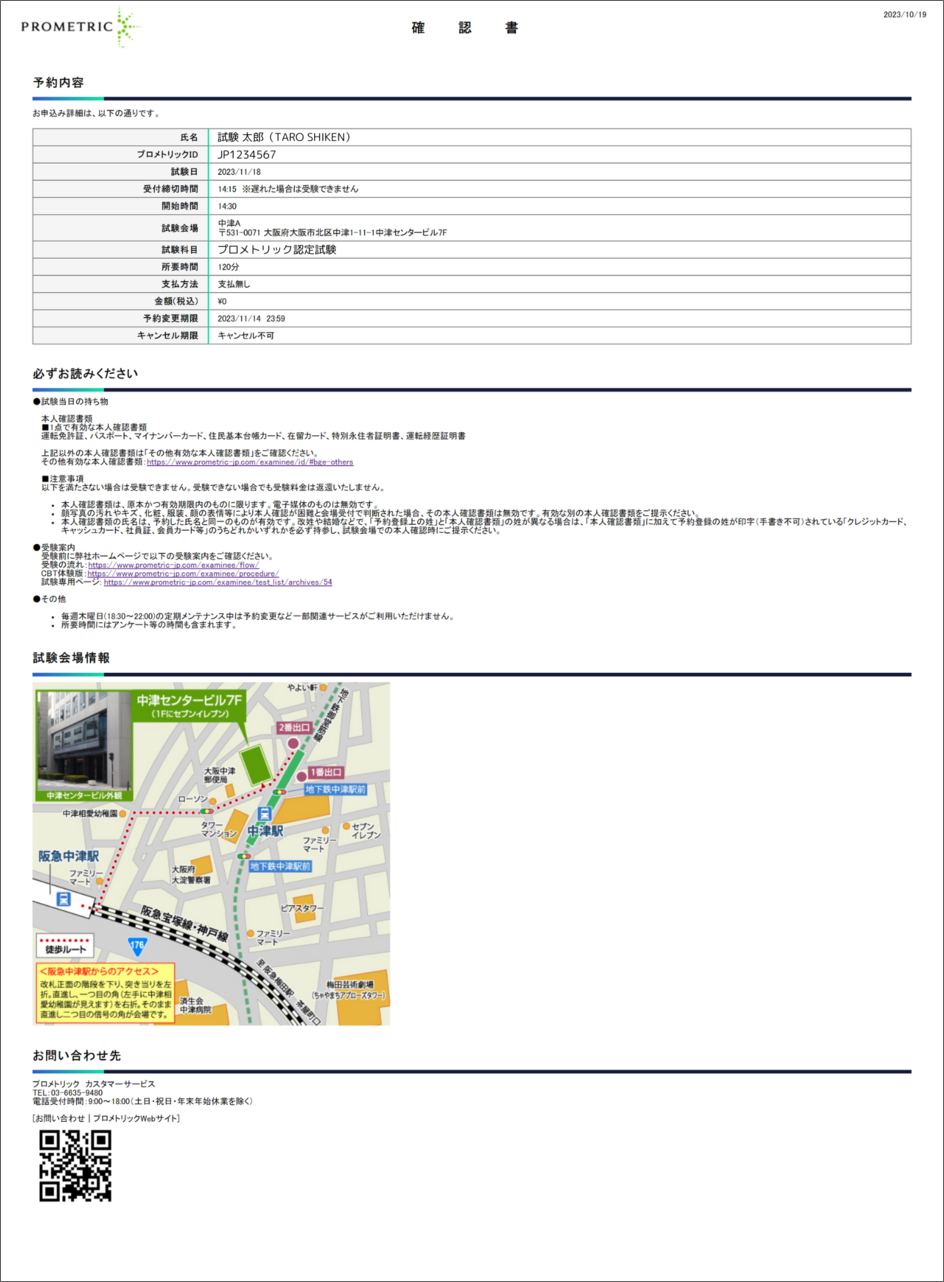
Confirmation Letter
You can print out Confirmation Letter that includes your test reservation details, what to bring on the day, and a map of Test Center.
Change/Cancellation
Log in from the dedicated page for Test you want to change or cancel.
Click "Change" to make changes or "Cancel" to cancel.
Notes
- Depending on Test, changes or cancellations may not be possible.
- If the deadline has passed, changes or cancellations cannot be made.